最終更新日:2012/02/29
Mac OS X 10.6.xで動作テストしてます。作ってちょっとテストしただけのものが多いです。
このページのRubyCocoa関係のAppleScriptのソースなどはほぼAppleScriptじゃないので、AppleScriptの勉強を始めたばかりの人には参考にならないと思います。ある程度やっていて、こういうことできないかなあ、って時に役に立つかもしれません。AppleScriptを始めたばかりの人にはAppleScript PARK / Introduction / Basicなどがお勧めです。
このページは非常に長いですが、JavaScriptがオンでUAにGeckoと書いてあるブラウザ(Safari,Firefox,Chrome等)の場合、左端にアウトラインが表示されます。アウトラインの▶をクリックすると小要素が表示されます。アウトラインで見たい内容を探しながら見ると、見やすいと思います。
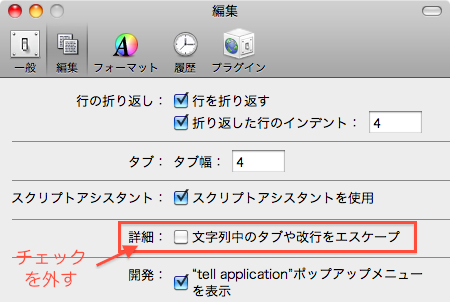
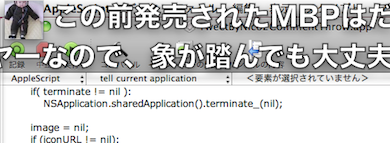
ここに書いてあるスクリプトは""の中に改行を含んだものが多くあります。スクリプトエディタの設定を下記画像のようにすると見やすいです。
MenuBarAppleScriptでここで書いたスクリプトと同じ事を実行できる場合があります。結構色々できるので、通常のAppleScriptではできないことを模索している人はもしかしたら出来る場合があるかもしれないので一度見て下さい。
使う人が居るかわかりませんが、ここにあるスクリプトは自由に使用できます。ここにあるものを自分のスクリプト中で使って配布したり、ここにあるのスクリプトを改造して使ってそれを配布しても大丈夫です。その際、許可、連絡等は必要ありません。
外部アプリケーションやOSAXが必要な処理をOS標準のRubyCocoaでやろうというネタです。rubyは全然知らないので適当で動いたらよしとしてます。RubyCocoaはOSに最初から入っているので特に何も準備しなくても動きます。
一見変なところで改行があるように見えるかもしれませんがそのままコピーしてください。
LionではRubyCocoaは動いたり動いたりしなかったりします。
Maverick標準状態ではこのページのRubyCocoaを使ったAppleScriptは動きません。
RubyのパスをGetting RubyCocoa to work in ruby scripts running on OS X 10.9 Mavericksのページに書いてあるとおりに書き換えると(シンプルなスクリプトは)動くのを確認しました。複雑なのは最近使っていないので試していません。
例:
do shell script "/System/Library/Frameworks/Ruby.framework/Versions/1.8/usr/bin/ruby -e " & quoted form of theRubyScript
例2:10.8以前と10.9両方対応させる
set theRubyScript to "require 'osx/cocoa';
#hogehoge
"

try
	do shell script "/usr/bin/ruby -e " & quoted form of theRubyScript
on error
	do shell script "/System/Library/Frameworks/Ruby.framework/Versions/1.8/usr/bin/ruby -e " & quoted form of theRubyScript
end try
URLを非表示のWebViewで表示してJavaScriptを実行して結果を返す。
Safariを操作しても同様のことはできますが、裏で実行したい場合はSafariを使うと邪魔になると思って作ってみた物です。WebViewはSafariとクッキーが共通なのでSafariでログイン済みならログイン後のURLも取得できるのでログイン必要なページ用curlの代わりにもなると思います。
set theText to "I like cat and dog."
set theEncText to do shell script "php -r 'print rawurlencode($argv[2]);'  v " & quoted form of theText
set theURL to "http://translate.google.co.jp/#auto%7Cja%7C" & theEncText
set theJavaScript to "document.getElementById('gt-res-content').innerHTML.replace(/<.*?>/g,'')"
set theResult to my webViewDoJavaScript(theURL, theJavaScript, 0.7, 5)
log theResult

on webViewDoJavaScript(theURL, theJavaScript, theRunJSDelay, theTimeoutSec)
	-- theURLを非表示のWebViewで表示してページ表示theRunJSDelay秒後theJavaScriptを実行して結果を返す
	-- theTimeoutSec経つと読み込み中でも待つのを終了してJavaScriptを実行して結果を返す。その際最初にtimeoutと出力する。

	-- 参考にしたURL
	-- http://rubycocoa.svn.sourceforge.net/viewvc/rubycocoa/trunk/src/sample/Scripts/darkroom.rb?revision=2115&view=markup
	set theRubyScript to "require 'osx/cocoa';
OSX.require_framework 'Webkit';

  module WebViewDoJavaScript
    class Run
      def initialize()
        app = OSX::NSApplication.sharedApplication;
        delegate = Processor.alloc.init;
        app.setDelegate(delegate);
        app.run;
      end
    end
    class Processor < OSX::NSObject
      include OSX
      attr_accessor :options, :web_view
      def initialize
        rect = [-16000.0, -16000.0, 1280, 800];
        win = NSWindow.alloc.initWithContentRect_styleMask_backing_defer(rect, NSBorderlessWindowMask, 2, 0);
        @web_view = WebView.alloc.initWithFrame(rect);
        @web_view.setFrameLoadDelegate(self);
        win.setContentView(@web_view);
      end

      def applicationDidFinishLaunching(notification)
        @web_view.mainFrame.loadRequest(NSURLRequest.requestWithURL(NSURL.URLWithString(ARGV[0])));
      	@timer = NSTimer.scheduledTimerWithTimeInterval_target_selector_userInfo_repeats(" & theTimeoutSec & ",self,:timeoutTimer,nil,false);
      end

      def timeoutTimer()
	  print 'timeout';
	 print @web_view.stringByEvaluatingJavaScriptFromString(ARGV[1]);
	  NSApplication.sharedApplication.terminate(nil);
      end

      def webView_didFinishLoadForFrame(web_view, frame)
		@timer = NSTimer.scheduledTimerWithTimeInterval_target_selector_userInfo_repeats(" & theRunJSDelay & ",self,:runJavaScript,nil,false);
      end

	def runJavaScript()
		print @web_view.stringByEvaluatingJavaScriptFromString(ARGV[1]);
		NSApplication.sharedApplication.terminate(nil);
	end
    end
  end
WebViewDoJavaScript::Run.new"
	return do shell script "/usr/bin/ruby -e " & quoted form of theRubyScript & "  " & quoted form of theURL & " " & quoted form of theJavaScript
end webViewDoJavaScript
この掲示板の179さんのをちょっと変更した物です。サービス名は英語で指定します。サブメニューが指定されている場合はそれも書く必要があります。アプリケーションのInfo.plistに書いてあります。
MailのメモはAppleScriptから作れないのですが、このスクリプトを使うとサービス経由でAppleScriptから簡単に作れたりします。他にもAppleScriptに対応してないけどサービスはあるって場合に使えるかもしれません。
クリップボードの内容を変更しないようにした。
こっちが古い方でクリップボードの内容が変わる
Firefoxからサービスで送ったデータはHTML形式の為、Mailのメモなどに貼付けた時にスタイルが消えてしまいます。そこでHTMLをRTFDに変換するとスタイルを保ったまま貼付けられました。
サウンドファイルを再生します。
この掲示板の171さんのをちょっと変更した物です。
playSoundFileを使ったAppleScriptだけでできたサウンドファイルプレイヤーです。
コマンドキーなどが押されているか調べます。コマンドキーを押しながらスクリプトを実行したら特定の処理をするなどに使えるかもしれません。
マウスの位置を取得します。
log getMouseLocation()

on getMouseLocation()
	set theRubyScript to "require 'osx/cocoa';
event=OSX::CGEventCreate(nil);
pt = OSX::CGEventGetLocation(event);
print pt.x, '
',pt.y;
"
	set thePtText to do shell script "/usr/bin/ruby -e " & quoted form of theRubyScript
	set theResultList to {paragraph 1 of thePtText as number, paragraph 2 of thePtText as number}
	return theResultList
end getMouseLocation
<マウスクリックをします。位置、ボタン、クリック回数、修飾キー、押している時間が指定できます。
クリックする物がボタン、メニュー項目等の場合UIElementActionで項目を名前等で指定してクリックできる場合があるかもしれません。
-- 現在のマウスの場所をコントロール+クリックする
my mouseClick({"mouse", "mouse"}, "left", 1, "control", 0.1)

-- アップルメニューあたりをクリックする
--my mouseClick({18, 10}, "left", 1, "", 0.1)

-- 100,100を1.1秒押すクリックする
-- miの長押しコンテキストメニューの表示テスト
--tell application "mi" to activate
--my mouseClick({100, 100}, "left", 1, "", 1.1)

-- 現在のマウスの場所を右クリックする
--my mouseClick({"mouse", "mouse"}, "right", 1, "", 0.1)

-- 現在のマウスの場所をミドルクリックする
--my mouseClick({"mouse", "mouse"}, "middle", 1, "", 0.1)

-- 現在のマウスの場所をトリプルクリックする
--my mouseClick({"mouse", "mouse"}, "left", 3, "", 0.1)

on mouseClick(thePosition, theButton, theClickCount, theModifierKeys, thePressSec)
	(*
ver.2010.6.11
 thePosition は {"mouse", "mouse"} で現在のマウスの位置をクリックする
 theButton は "left" "right" "middle"
 theClickCount はクリック回数。2でダブルクリック
 theModifierKeys は command shift control option fn caps
 thePressSecは押している時間。秒
 *)
	set theModifierKeys to theModifierKeys & " - "
	set thePressSecText to thePressSec as text
	set theRubyScript to "require 'osx/cocoa';
if ARGV[0] == 'mouse' then
event=OSX::CGEventCreate(nil);
pos = OSX::CGEventGetLocation(event);
print pos.x , ',', pos.y;
else
pos = [ARGV[0], ARGV[1]];

end

buttonInput = ARGV[2];
clickCount = ARGV[3].to_i;
modifierKeys = ARGV[4];
thePressSec = ARGV[5].to_f;

if  buttonInput  == 'left' then
button=0;
eventTypeDown=1;
eventTypeUp=2;
end

if buttonInput == 'right' then
button=1;
eventTypeDown=3;
eventTypeUp=4;
end

if  buttonInput == 'middle'  then
button=2;
eventTypeDown=25;
eventTypeUp=26;
end

eventFlag = 0;

if modifierKeys.index('command' ) != nil then
eventFlag |= 0x00100000;
end

if modifierKeys.index('shift' ) != nil then
eventFlag |= 0x00020000;
end

if modifierKeys.index('option' ) != nil then
eventFlag |= 0x00080000;
end

if modifierKeys.index('control' ) != nil then
eventFlag |= 0x00040000;
end

if modifierKeys.index('fn' ) != nil then
eventFlag |= 0x00800000;
end

if modifierKeys.index('caps' ) != nil then
eventFlag |= 0x00010000;
end


ev=OSX::CGEventCreateMouseEvent(nil, eventTypeDown, pos, button);
OSX::CGEventSetIntegerValueField(ev, 1, clickCount);
OSX::CGEventSetFlags(ev, eventFlag);
OSX::CGEventPost(0,ev);

sleep thePressSec;

ev2=OSX::CGEventCreateMouseEvent(nil, eventTypeUp, pos, button);
OSX::CGEventSetIntegerValueField(ev2, 1, clickCount);
OSX::CGEventSetFlags(ev2, eventFlag);
OSX::CGEventPost(0,ev2);
"
	do shell script "/usr/bin/ruby -e " & quoted form of theRubyScript & " " & item 1 of thePosition & " " & item 2 of thePosition & " " & theButton & " " & theClickCount & " " & quoted form of theModifierKeys & " " & quoted form of thePressSecText
end mouseClick
押されたキーのキーコードを取得する。キーが押されるまで待機します。押されたキーのイベントは最前面のアプリケーションに伝わります。
もっとスマートな方法がある気がします。
サンプルとして次のスクリプト。キーが押されたらマウスの位置を記録してescが押されたら終了してマウス位置を返します。
Finderのアイコンを設定/変更したいと思ったけどFinderやSystem Eventsで昔できなかった記憶があったので作ってみたら簡単でした。もしかしたらもうFinderとかでもできるようになってるかもしれませんが。
HTMLをpng,jpg,pdf形式に変換します。専用のソフトもありますがなんとかできました。
set savePath to "~/Desktop/URLToImagetest.pdf"
set theURL to "http://memogaki.soudesune.net/" --"http://www.yahoo.co.jp/"
-- ページのURL、タイトル、ファイビコンをページに追加するJavaScript
-- サイトによってはうまくいかない場合があります
-- http://d.hatena.ne.jp/h13i32maru/20090101/p1
set js1 to "
function htmlspecialchars(ch) {
ch = ch.replace(/&/g,'&') ;
ch = ch.replace(/\"/g,'"') ;
ch = ch.replace(/'/g,''') ;
ch = ch.replace(/</g,'<') ;
ch = ch.replace(/>/g,'>') ;
return ch ;
}
var faviconImgSrc = '';
var links = document.getElementsByTagName('link');
for(var i = 0; i < links.length; i++){
if(links[i].rel.toLowerCase() == 'shortcut icon' || links[i].rel.toLowerCase() == 'icon'){
favicon = links[i].href;
faviconImgSrc = '<img width=16 src=\"' + favicon + '\"> '
break;
}
}
infoSrc = '<div style=\"margin : 3px; padding : 4px; text-align : left; background : #eee; color : #000; font-size : 14px; -webkit-border-radius: 5px; border: 1px solid #000; word-break : break-all; line-height :1.4; font-family : sans-serif; \">'+ faviconImgSrc + htmlspecialchars ( document.title ) +'<br><a style=\"color:blue;\" href=\"'+location.href +'\">' + htmlspecialchars( location.href ) + '</a></div>';
d=document.createElement('DIV');document.body.insertBefore(d,document.body.firstChild);d.innerHTML= infoSrc;
"
-- 後ろに追加
-- d=document.createElement('DIV');document.body.appendChild(d);d.innerHTML= infoSrc;
set allJS to "(function(){" & js1 & ";focus();})();"
my URLToImage(theURL, allJS, "", 60, 2.5, false, savePath, 1000, 1000)
on URLToImage(theURL, theJavaScript, thePostJavaScript, theTimeoutSec, theWaitJavaScriptSec, isTransparent, theImagePath, theWidth, theHeight)
-- ver2010.07.06
-- theURLを非表示のWebViewで表示してtheJavaScriptを実行した後にtheImagePath(posix path)にスクリーンショットを保存する。
--theJavaScript は保存前に実行、thePostJavaScriptは保存した後に実行する
-- theJavaScript、thePostJavaScriptの結果を返す
-- 読み込み完了までにtheTimeoutSec経つとtimeoutと出力して終了する。画像は保存しない。
-- theWaitJavaScriptSecはページの読み込み完了後にJavaScriptを実行後保存するまでの時間を指定する。ページを書き換えるJavaScriptの場合一定時間を与えないと保存した時に変更が適用されない。また、ページにJavaScriptが最初からある場合もそのJavaScriptの実行時間となります。
-- isTransparentがtrueだと何も無い背景が透明になる
-- theImagePathはpdf,png,jpgが指定可能。
-- theWidth, theHeightでウインドウサイズを指定できる。だいたい目安。足りなくても全体が保存される場合もあるがレイアウトが変になる場合もある。frameのページの場合はこのサイズになるようだ。
--参考にしたページ
-- http://rubycocoa.svn.sourceforge.net/viewvc/rubycocoa/trunk/src/sample/Scripts/MyRoom.rb?revision=2115&view=markup
-- http://hmdt-web.net/coral/
if isTransparent is true then
set isTransparent to "1"
else
set isTransparent to "0"
end if
set theRubyScript to "require 'osx/cocoa'
OSX.require_framework 'Webkit'
module MyRoom
class Run
def initialize()
app = OSX::NSApplication.sharedApplication
delegate = Processor.alloc.init
app.setDelegate(delegate)
app.run
end
end
class Processor < OSX::NSObject
include OSX
attr_accessor :options, :web_view, :runJS
def initialize
isTransparent = ARGV[3];
rect = [-16000.0, -16000.0, " & theWidth & ", " & theHeight & "];
win = NSWindow.alloc.initWithContentRect_styleMask_backing_defer(rect, NSBorderlessWindowMask, 2, 0);
@web_view = WebView.alloc.initWithFrame(win.frame);
@web_view.setFrameLoadDelegate(self);
@web_view.setMediaStyle('screen');
@prefs = @web_view.preferences();
@prefs.setShouldPrintBackgrounds(true);
@prefs.setUserStyleSheetEnabled(false);
if isTransparent
win.setBackgroundColor(NSColor.clearColor);
@web_view.setDrawsBackground(false);
end
win.setContentView(@web_view);
@runJS = 0;
end
def applicationDidFinishLaunching(notification)
@web_view.mainFrame.loadRequest(NSURLRequest.requestWithURL(NSURL.URLWithString(ARGV[0])));
@timer = NSTimer.scheduledTimerWithTimeInterval_target_selector_userInfo_repeats(" & theTimeoutSec & ",self,:timeoutTimer,nil,false);
end
def timeoutTimer(notification)
print 'timeout
';
#self.saveImage();
NSApplication.sharedApplication.terminate(nil);
end
def saveTimer(notification)
self.saveImage();
print @web_view.stringByEvaluatingJavaScriptFromString(ARGV[4]);
print 'ok
';
NSApplication.sharedApplication.terminate(nil);
end
def webView_didFinishLoadForFrame(web_view, frame)
if web_view.mainFrame() == frame
@timer = NSTimer.scheduledTimerWithTimeInterval_target_selector_userInfo_repeats(" & theWaitJavaScriptSec & ",self,:saveTimer,nil,false);
if 0 == @runJS
print @web_view.stringByEvaluatingJavaScriptFromString(ARGV[1]);
@runJS = 1;
end
end
end
def saveImage()
savePath = ARGV[2];
@documentView = @web_view.mainFrame.frameView.documentView;
frame = @documentView.frame;
@data = @documentView.dataWithPDFInsideRect(frame);
savePath = NSString.stringWithString(savePath);
if /^~/ =~ savePath
savePath = savePath.stringByExpandingTildeInPath();
end
if /jpg$/i =~ savePath
saveType = NSJPEGFileType;
elsif /png$/i =~ savePath
saveType = NSPNGFileType;
elsif /tiff$/i =~ savePath
saveType = NSTIFFFileType;
else
saveType = 'pdf';
end
if saveType != 'pdf'
@img = NSImage.alloc.initWithData(@data );
@data = @img.TIFFRepresentation;
@bitmap = NSBitmapImageRep.imageRepWithData(@data);
@data = @bitmap.representationUsingType_properties(saveType,nil);
end
@data.writeToFile_atomically(savePath,true);
end
end
end
MyRoom::Run.new"
return do shell script "/usr/bin/ruby -e " & quoted form of theRubyScript & " " & quoted form of theURL & " " & quoted form of theJavaScript & " " & quoted form of theImagePath & " " & isTransparent & " " & quoted form of thePostJavaScript
end URLToImage
自分は解像度を変えることは無いのですが作ってみました。
RTFとはOSXのスタイル付きテキストの標準データです。TextEdit、Safari、スクリプトエディタなどでコピーしたスタイル付きテキストデータがRTFとしてクリップボードに入っています。これをhtmlとして使うにはTextEditで書類を作ってペーストしてhtmlで保存すればいいのですがめんどくさいのでクリップボードのデータを直接変換できないかやってみてできたのがこれです。
下記スクリプトでクリップボードのRTFをhtmlに変換できます。しかし、このスクリプトで変換したものは全体が一つのhtmlファイルで文字色等がスタイルシートで定義されているので他のhtmlにコピーする時にスタイル部分と本文部分の2カ所になってしまいます。またスタイルの名前は作成ごとに同じですが定義が違うのでこのスクリプトで作ったhtmlを一つのページに複数貼付けることができません。そこでスタイルをstyle属性で直接指定するように変換するスクリプトを作りました。これでスクリプトエディタのソースから作ったhtmlが下記スクリプトになります。
ひらがなとカタカナの混じったテキストをひらがなとカタカナを分けないであいうえお順でソートしたいと思ったので作ってみました。
この色付きのスクリプトもconvertRTF2HTMLSourceinClipboardでhtmlを作りました。
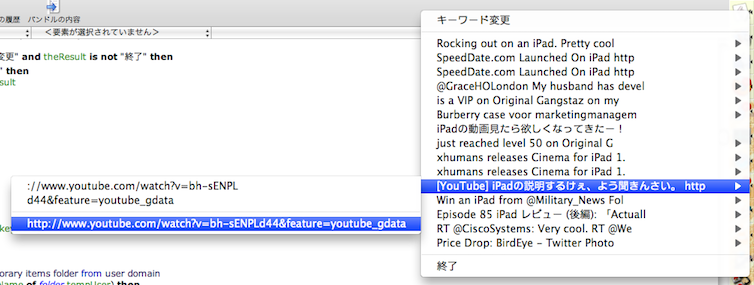
下記画像のような独自のコンテキストメニューを表示できます。choose from listの代わりに使えたりするかな?あと、画像等も表示できるので情報の表示にも使えそうな感じがしました。OpenFileHelperでも使ってます。
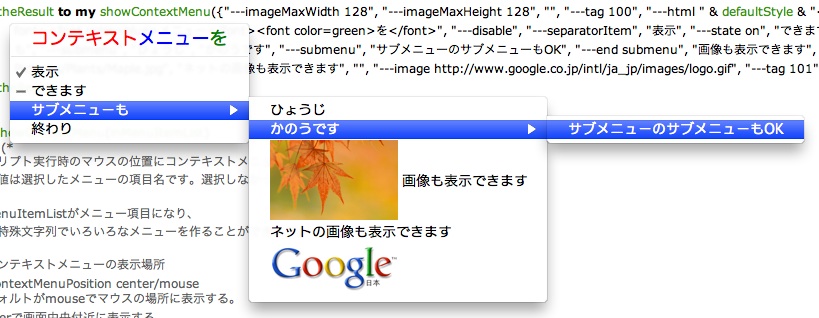
アイコンも表示できるようにした。
![]()
-- 簡単なメニュー
--set theResult to my showContextMenu({"いぬ", "ねこ", "きりん"})

--複雑なメニュー
set defaultStyle to "<style>*{font-size:18px; font-family:'Hiragino Maru Gothic Pro'}</style>"
set theResult to my showContextMenu({"---imageMaxWidth 128", "---imageMaxHeight 128", "", "---tag 100", "---html " & defaultStyle & "<font color=red>コンテキスト</font><font color=blue>メニュー</font><font color=green>を</font>", "---disable", "---separatorItem", "表示", "---state on", "できます", "---state mixed", "Lionでは画像のパスが変わっているので", "表示されない画像があります", "サブメニューも", "---submenu", "ひょうじ", "かのうです", "---submenu", "サブメニューのサブメニューもOK", "---end submenu", "画像も表示できます", "---image /Library/Desktop Pictures/Plants/Maple.jpg", "ネットの画像も表示できます", "", "---image http://www.google.co.jp/intl/ja_jp/images/logo.gif", "---tag 101", "Preview Icon", "---icon /Applications/Preview.app", "Safari Icon", "---icon Safari", "App Folder", "---icon /Applications", "サイトフォルダ", "---icon ~/Sites", "---end submenu", "終わり"})
log theResult


on showContextMenu(inMenuItemList)
	(*
ver.2011.08.13

スクリプト実行時のマウスの位置にコンテキストメニューを表示します。
返り値は選択したメニューの項目名です。選択しなかった場合は空文字です。

inMenuItemListがメニュー項目になり、
下記特殊文字列でいろいろなメニューを作ることができます。

★コンテキストメニューの表示場所
---contextMenuPosition center/mouse
デフォルトがmouseでマウスの場所に表示する。
centerで画面中央付近に表示する。

★サブメニューを作るには項目名を
---submenu
にします。

★サブメニューを終了するときは
---end submenu
にします。

★区切りは
---separatorItem
です。


▲項目名の次に次の文字列を書くことによりメニューの属性を設定できます。
★ ---disable
選択できないメニューアイテムにします。タイトル、説明等に。

★ ---state on/mixed
チェックを付けます

★ ---image URL/PATH
★ ---icon PATH
画像を表示します。iconの場合アプリケーション、ファイルのアイコンです。
これの前に
 ★ ---imageMaxWidth #maxPixel
 ★ ---imageMaxHeight #maxPixel
を書くことによって画像の最大サイズを設定できます。
設定すると以降すべて適用されます。複数回設定することも可能です。
デフォルトは0で原寸で表示します。
PATHは
~/Sites/hoge.html
形式でも書けます。

★ ---tag #tagNo
選択時に項目名ではなく#tagNoを返すようになります。
項目名が空文字や同じ項目名がある場合に区別したい場合に使います。
#tagNoは1以上の数値。

★ ---html html text
文字列を指定したHTMLにします。ただし、すべての装飾に対応していません。
これの前に
 ★ ---baseURL url
を書くことによってbaseURLの設定ができます。

参考にしたページ
http://rubycocoa.svn.sourceforge.net/viewvc/rubycocoa/trunk/src/sample/Scripts/darkroom.rb?revision=2115&view=markup

*)
	set theArgvStr to ""
	repeat with theItem in inMenuItemList
		set theArgvStr to theArgvStr & " " & quoted form of theItem
	end repeat


	set theRubyScript to "require 'osx/cocoa';

  module ShowContextMenu
    class Run
      def initialize()
        app = OSX::NSApplication.sharedApplication;
        delegate = Processor.alloc.init;
        app.setDelegate(delegate);
        app.run;
      end
    end
    class Processor < OSX::NSObject
      include OSX
      attr_accessor :win
      def initialize
        rect = [-1,-1, 1, 1];
        @win = NSWindow.alloc.initWithContentRect_styleMask_backing_defer(rect, NSBorderlessWindowMask, 2, 0);
       end

      def applicationDidFinishLaunching(notification)

		theMenu = NSMenu.alloc.initWithTitle('AS context menu');

		theMenu.setAutoenablesItems(false);
		theMenu.setDelegate(self)


		menuArray = [ theMenu ];
		lastMenuItem = nil;

		imageMaxWidth = 0;
		imageMaxHeight = 0;

		fontSize = 0;
		baseURL = nil;

		contextMenuPosition = 'mouse';

		ARGV.shift();
		ARGV.each do |str|
			if /^---imageMaxWidth (.+)/ =~ str then
				imageMaxWidth = $1.to_i();
			elsif /^---imageMaxHeight (.+)/ =~ str then
				imageMaxHeight = $1.to_i();
			elsif /^---fontSize (.+)/ =~ str then
				fontSize = $1.to_i();
			elsif /^---baseURL (.+)/ =~ str then
				baseURL = $1;
			elsif /^---contextMenuPosition (.+)/ =~ str then
				contextMenuPosition = $1;
			elsif /^---submenu/ =~ str then
				theSubMenu = NSMenu.alloc.initWithTitle('');
				theSubMenu.setAutoenablesItems(false);
				lastMenuItem.setSubmenu(theSubMenu);

				menuArray.unshift(theSubMenu);
			elsif /^---end submenu/ =~ str then
				menuArray.shift();
			elsif '---disable' == str then
				lastMenuItem.setEnabled(false);
			elsif  /^---state (on|mixed|off)/ =~ str  then
				if( $1 == 'on' )
					lastMenuItem.setState(NSOnState);
				elsif( $1 == 'mixed' )
					lastMenuItem.setState(NSMixedState);
				end
			elsif /^---(image|icon) (.+)/ =~ str then
				imageType = $1;
				path = NSString.stringWithString($2);

				if /^~/ =~ path
					path = path.stringByExpandingTildeInPath();
				end

				if imageType == 'icon'
					path = NSWorkspace.sharedWorkspace().fullPathForApplication(path);
					image = NSWorkspace.sharedWorkspace().iconForFile(path);
				else
					if /^http/ =~ path
						image = NSImage.alloc.initWithContentsOfURL(NSURL.URLWithString(path));
					else
						image = NSImage.alloc.initWithContentsOfFile(path);
					end
				end

				if image == nil
					next
				end

				imgSize = image.size();


				if( imageMaxWidth >0 && imgSize.width > imageMaxWidth )
					imgSize.height = imgSize.height * imageMaxWidth / imgSize.width;
					imgSize.width = imageMaxWidth
				end

				if( imageMaxHeight >0 && imgSize.height > imageMaxHeight )
					imgSize.width = imgSize.width * imageMaxHeight / imgSize.height;
					imgSize.height = imageMaxHeight
				end

				image.setSize(imgSize);

				lastMenuItem.setImage(image);
			elsif /^---tag (.+)/ =~ str then
				lastMenuItem.setTag($1.to_i(10));
			elsif /^---separatorItem/ =~ str then
				menuArray[0].addItem( OSX::NSMenuItem.separatorItem());
			elsif /^---html (.+)/m =~ str then
				html = NSString.stringWithString($1);
				data = html.dataUsingEncoding( NSUTF8StringEncoding);

				if baseURL
					opt = {NSCharacterEncodingDocumentOption => NSUTF8StringEncoding, NSBaseURLDocumentOption => baseURL };
				else
					opt = {NSCharacterEncodingDocumentOption => NSUTF8StringEncoding };
				end
				attrStr = OSX::NSAttributedString.alloc.initWithHTML_options_documentAttributes(data,opt,nil);

				lastMenuItem.setAttributedTitle(attrStr);
			else
				menuItem  = menuArray[0].addItemWithTitle_action_keyEquivalent(str, :selectMenu,'');
				menuItem.setTarget(self);
				menuItem.setTag(0);
				lastMenuItem = menuItem;
			end

		end

		screenSize = NSScreen.mainScreen.frame;

		cgevent=OSX::CGEventCreate(nil);
		pt = OSX::CGEventGetLocation(cgevent);
		if contextMenuPosition == 'center'
			pt.x = screenSize.size.width / 3.3;
			pt.y = screenSize.size.height - 30;
		else
			pt.y = screenSize.size.height - pt.y;
		end

      		event = NSEvent.mouseEventWithType_location_modifierFlags_timestamp_windowNumber_context_eventNumber_clickCount_pressure(OSX::NSLeftMouseDown,pt,0,0,win.windowNumber(),nil,0,0,1.0);


		 font = nil;
		 if fontSize != 0
		 	font = OSX::NSFont.menuBarFontOfSize(fontSize)
		 end

		  NSMenu.popUpContextMenu_withEvent_forView_withFont(theMenu, event, nil,font );
      end

	def menuDidClose(menu)
	  NSApplication.sharedApplication.performSelector_withObject_afterDelay(:terminate_,nil,0.2)
	end

	def selectMenu(menuItem)
		tag = menuItem.tag();

		if tag != 0
			print tag;
		else
			print menuItem.title();
		end
		NSApplication.sharedApplication.terminate(nil);
	end

    end
  end
ShowContextMenu::Run.new"
	return do shell script "/usr/bin/ruby -e " & quoted form of theRubyScript & "  '' " & theArgvStr
end showContextMenuAppleScriptのダウンロード:showContextMenu_tenki.app.zip
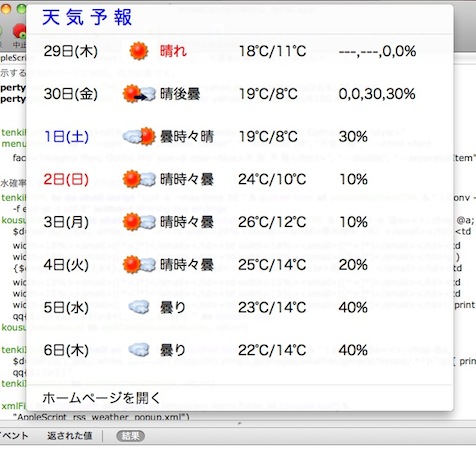
天気取得部分は昔別件で作ったスクリプトを流用してますが、すごい無理矢理で読みにくいです。
AppleScriptのダウンロード:
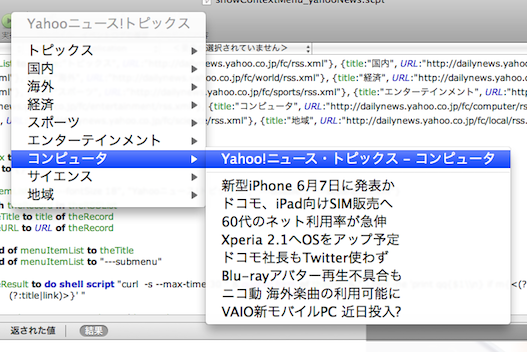
ニュースを選択するとブラウザで表示します。
Finderだとread onlyになっていたけど設定したかったので作ってみました。
An AppleScript droplet to change the creation date - Mac OS X Hintsにいろいろな方法が書いてありました。
my setCreationDate("/Users/Panda/Desktop/AppleScript.scpt", ((current date) - days * 1))

on setCreationDate(theFilePath, theSetCreationDate)
	(*
	--パスはposix path
	--theSetCreationDateは current date など
	--theSetCreationDateがファイルのModification dateの後の場合、Modification dateをtheSetCreationDateにする(こうしない設定できない)

AppleScriptで現在時間と設定時間の差を計算してrubyでその差から設定時間を設定するので
	ここの実行時間の差だけ設定時間がずれます。ほとんど差はなくて多くて1秒だと思います。
	*)

	set e to current date
	set f to (theSetCreationDate - e) as text
	set f to do shell script "perl -e 'print " & f & "'"

	set theFileAlias to theFilePath as POSIX file as alias
	tell application "Finder"
		if modification date of theFileAlias < theSetCreationDate then
			set updateModificationDate to "y"
		else
			set updateModificationDate to "n"
		end if
	end tell

	set theRubyScript to "require 'osx/cocoa';
filePath = ARGV[1];
f = ARGV[2];
updateModificationDate = ARGV[3];
fm = OSX::NSFileManager.defaultManager;
createDate    = OSX::NSDate.dateWithTimeIntervalSinceNow(f);

if updateModificationDate == 'y'
	d = {OSX::NSFileModificationDate => createDate};
	fm.setAttributes_ofItemAtPath_error(d,filePath,nil);
end

d = {OSX::NSFileCreationDate => createDate};
fm.setAttributes_ofItemAtPath_error(d,filePath,nil);"
	do shell script "/usr/bin/ruby -e " & quoted form of theRubyScript & " v " & quoted form of theFilePath & " " & quoted form of f & " " & updateModificationDate

end setCreationDate
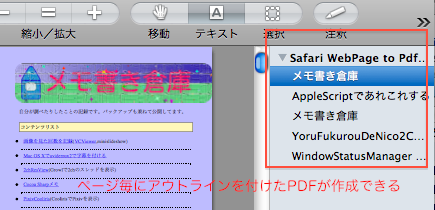
PDFを結合するにはAutomatorで使われている/System/Library/Automator/Combine PDF Pages.action/Contents/Resources/join.pyを使えば簡単なのですが、これで結合するとリンクがクリックできなくなるのでPDFKitで結合するものを書いてみました。結果は期待通り結合してもリンクがクリックできるPDFになりました。ついでにアウトラインを付けたらよりわかりやすくなるかなと思い、ページ毎ですがアウトラインも付けられるようにしてみました。
ちなみにアウトラインとは下記画像の部分のことです。ページの説明を入れておけばわかりやすくなると思います。
下記スクリプトをドロップレットにしたもの:JoinPDF.app.zip
on JoinPDFWithOutline(savePDFPath, fileAndLabelList)
	-- ver2010.06.30

	(*
	savePDFPathは結合したpdfの保存するパス

	fileAndLabelListは
	{ "~/hoge.pdf","ラベル","/foo/hage.pdf","カレーの作り方"}
	の様にファイルパスとそのラベルのリストになります。
	ラベルには/が使えないようです。/に変換します。他にも使えない文字があるかもしれません。
	*)

	set joinPDFPaths to ""

	repeat with theFile in fileAndLabelList
		set joinPDFPaths to joinPDFPaths & " " & quoted form of theFile
	end repeat

	set theRubyScript to "
require 'osx/cocoa';
OSX.require_framework 'PDFKit';

pool = OSX::NSAutoreleasePool.alloc.init();

savePDFPath = ARGV[1];
joinPDFPath = ARGV[2..-1];

pdfDoc = OSX::PDFDocument.alloc.init();

outline = OSX::PDFOutline.alloc.init();
pdfDoc.setOutlineRoot(outline);

pIndex = 0;
while pIndex < joinPDFPath.length - 1
	p = joinPDFPath[pIndex];
	label = joinPDFPath[pIndex+1];

	pool2 = OSX::NSAutoreleasePool.alloc.init();

	p2 = OSX::NSString.stringWithString(p);
	if /^~/ =~ p2
	 p2 = p2.stringByExpandingTildeInPath();
	end

	addPDF = OSX::PDFDocument.alloc.initWithURL(OSX::NSURL.fileURLWithPath(p2));
      if addPDF != nil

	pageCount = addPDF.pageCount();
	i = 0;
	while i < pageCount
		currentPage = addPDF.pageAtIndex(i);
		currentPageCount = pdfDoc.pageCount();
	  	pdfDoc.insertPage_atIndex(currentPage, currentPageCount);

		targetPage = pdfDoc.pageAtIndex(pdfDoc.pageCount()-1);
		pageOutline = OSX::PDFOutline.alloc.init();
		pageOutline.setAction(OSX::PDFActionGoTo.alloc.init());

		pageRect = targetPage.boundsForBox(0).to_a;
		h = pageRect[1][1];
		pageOutline.setDestination(OSX::PDFDestination.alloc.initWithPage_atPoint(targetPage, [0, h]));

		setLabel = label;
		if i != 0
		    pageNo = i+1;
			setLabel = setLabel + ' - ' + pageNo.to_s;
		end

		setLabel = setLabel.gsub(/\\//, '/');

		#setLabel = OSX::NSString.stringWithString(setLabel);
		#setLabel = setLabel.stringByAddingPercentEscapesUsingEncoding(4);

		pageOutline.setLabel(setLabel);

		outline.insertChild_atIndex( pageOutline, outline.numberOfChildren());

		i=i+1;
	end

	addPDF.release();

	end

	pool2.release();

	pIndex = pIndex + 2;
end


savePDFPath = OSX::NSString.stringWithString(savePDFPath);
if /^~/ =~ savePDFPath
 savePDFPath = savePDFPath.stringByExpandingTildeInPath();
end

pdfDoc.writeToFile(savePDFPath);
pdfDoc.release();
pool.release();

"
	return do shell script "/usr/bin/ruby -e " & quoted form of theRubyScript & " v  " & quoted form of savePDFPath & " " & joinPDFPaths
end JoinPDFWithOutline
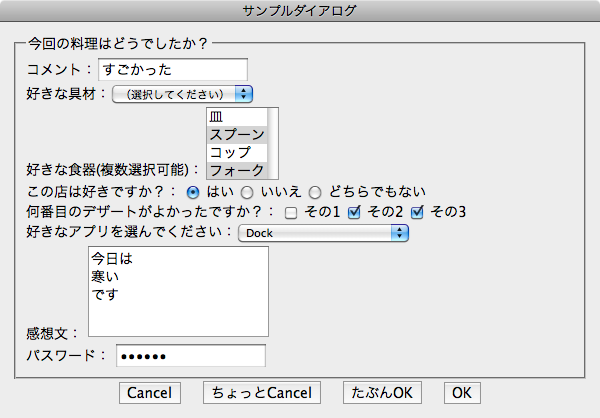
HTMLのフォームをダイアログとして表示して結果を返します。display dialogなどより複雑なダイアログを表示することができます。軽く探したところAppleScriptで複雑なダイアログを簡単に表示する方法が見つからなかったので出番があるかも。
作ったけどまだ実際には使って無いです。
下記画像のようなHTMLフォームをウインドウに表示して(画像のはレイアウトが手抜きですが)、結果が下の画像になります。
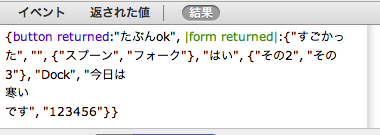
上のスクリーンショットのダイアログを表示するスクリプトになります。
tell application "System Events"
	set appNameList to name of every process
end tell

set appNameSelect to "好きなアプリを選んでください:" & (my makeHTMLFormSelectFromList(appNameList, 6, "(選択してください)"))

set theForm to "<fieldset>
<legend>今回の料理はどうでしたか?</legend>
コメント:<input type=text size=20 name=1 value='すごかった'>
<br>
好きな具材:<select name=2>
<option selected='selected' value=''>(選択してください)</option>
<option>たくあん</option>
<option>にく</option>
<option>こめ</option>
<option>さんま</option>
</select>
<br>
好きな食器(複数選択可能):<select name=3 multiple>
<option>皿</option>
<option selected>スプーン</option>
<option>コップ</option>
<option selected>フォーク</option>
</select>
<br>
この店は好きですか?:
<input type='radio' name=4 value='はい' checked> はい
<input type='radio' name=4 value='いいえ'> いいえ
<input type='radio' name=4 value='どちらでもない'> どちらでもない
<br>
何番目のデザートがよかったですか?:
<input type='checkbox' name=5 value='その1'> その1
<input type='checkbox' name=5 value='その2'> その2
<input type='checkbox' name=5 value='その3' checked> その3
<br>" & appNameSelect & "
<br>
感想文:
<textarea cols=20 rows=5 name=7>今日は
寒い
です</textarea>
<br>
パスワード:
<input type=password size=20 name=8 value='123456'>

</fieldset>

<div style='text-align : center'>
<button type='submit' name='button' value='cancel'>Cancel</button>
 <button type='submit' name='button' value='ちょっとcancel'>ちょっとCancel</button>
 <button type='submit' name='button' value='たぶんok'>たぶんOK</button>
 <button type='submit' name='button' value='ok'>OK</button>
</div>"

set theResult to my displayHTMLFormDialog("サンプルダイアログ", theForm, 8, "", 600)
set theButton to button returned of theResult
set theFormList to |form returned| of theResult

log "button:" & theButton
log "1:" & item 1 of theFormList
log "6:" & item 6 of theFormList
log "8:" & item 8 of theFormList
return theResult


on makeHTMLFormSelectFromList(theList, theSelectName, theDefaultName)
	(*
リストの内容を表示するselect(ポップアップメニュー)を作成する

my makeHTMLFormSelectFromList({"いぬ","ねこ"}, 1, "好きなペット")
*)
	set theDefaultName to do shell script "php -r 'print htmlspecialchars($argv[2]);' '' " & quoted form of theDefaultName

	set theForm to "<select name=" & theSelectName & "><option selected='selected' value=''>" & theDefaultName & "</option>"
	repeat with theName in theList
		set theName to do shell script "php -r 'print htmlspecialchars($argv[2]);' '' " & quoted form of theName
		set theForm to theForm & "<option>" & theName & "</option>"
	end repeat
	set theForm to theForm & "</select>"

	return theForm
end makeHTMLFormSelectFromList

on displayHTMLFormDialog(windowTitle, formHTML, inputCount, theCSS, windowWidth)
	(*
	ver.2010-10-23

	HTMLのformで作ったダイアログを表示する。
	HTML、CSSはいい感じに書き換えて使ってください。

	★★注意点
	10.6ではウインドウがアクティブになりますが、それ以前ではアクティブになりません。
	もしかしたらそこ(setActivationPolicyあたり)のrubyスクリプトが原因で10.6以外では動かないかもしれません。

	ウインドウは最前面に表示しています。
	変更するには
	win.setLevel
	を削除、変更します。

	★★引数
	★ windowTitle
	ウインドウのタイトル

	★ formHTML
	formのHTML。
	<form></form>内に挿入されるので<form>は必要ありません。
	HTMLは自由に書くことができるが、
	formのパーツのnameは1,2,3のように順に付けていく。
	結果はリストで返されてnameの数字が入力した値が保存されるインデックスとなる。
	buttonの名前はbuttonにします。

	★ inputCount
	formHTMLのnameの最大値。
	この長さのリストに結果を入れて返す。

	★ theCSS
	CSS。headのstyle内に挿入される

	★ windowWidth
	ウインドウの幅。高さは自動計算される。

	★★返り値
	display dialogと似ているレコードになります。
	例:{button returned:"ボタン名", |form returned|:{"name=1のvalue", "name=2のvalue", {"name=3のvalueその1", "name=3のvalueその2"}}}

	★ button returned
	押したボタンのname

	★ |form returned|
	フォームの値をリスト。フォームの部品のnameがリストのインデックスになります。
	<input type=text size=20 name=1 value='家'>
	の様にnameが1の場合はリストの一番目になります。
	3の場合は3番目になります。
	結果が無い場合は "" になります。
	checkboxで同じ名前を指定した場合や、
	selectでmultipleを指定した場合はリストになり、複数の結果が入ります。
	*)


	if formHTML does not contain "button" or formHTML does not contain "submit" then
		-- ボタンが無い
		error "displayHTMLFormDialog:ボタンがありません"
	end if

	set theHTML to "
<html>
<head>
<meta http-equiv='content-type' content='text/html; charset=utf-8'>
<style type='text/css'>
body
{
	background: rgb(237, 237, 237);
	margin : 0px;
	padding : 0px;
}

*
{
	font-family: 'Lucida Grande';
	font-size : 14px;
	color : black;
}

form
{
	padding : 12px;
	margin : 0px;
}

" & theCSS & "
</style>

<script>
function load()
{
	var menuWidth = window.outerWidth - window.innerWidth;
	var menuHeight = window.outerHeight - window.innerHeight;

	var dialog = document.getElementById( 'dialog' );

	var newWidth = dialog.clientWidth+menuWidth;
	var newHeight = dialog.clientHeight+menuHeight;

	//alert(''+menuWidth+'//'+menuHeight+'////'+dialog.clientWidth+'/'+ dialog.clientHeight);
	window.resizeTo(newWidth, newHeight);

	x = (screen.width - newWidth) / 2;
	y = (screen.height - newHeight) / 2 -100;
	moveTo(x,y);
}
</script>

</head>
<body onload='load()'>
<form id=dialog action='click:' method=get>

" & formHTML & "</form></body></html>"

	(*
	参考にしたURL

	http://rubycocoa.svn.sourceforge.net/viewvc/rubycocoa/trunk/src/sample/Scripts/darkroom.rb?revision=2115&view=markup

	Snow Leopard & LSUIElement -> application not activating properly, window not "active" despite being "key" - Stack Overflow
http://stackoverflow.com/questions/2928695/snow-leopard-lsuielement-application-not-activating-properly-window-not-ac

	*)
	set theRubyScript to "require 'osx/cocoa';
OSX.require_framework 'Webkit';

  module WebViewFormDialog
    class Run
      def initialize()
        app = OSX::NSApplication.sharedApplication;
        delegate = Processor.alloc.init;
        app.setDelegate(delegate);
        app.run;
      end
    end
    class Processor < OSX::NSObject
      include OSX
      attr_accessor :options, :web_view, :win
      def initialize
	rect = [0,0,ARGV[2],1000];
        @win = NSWindow.alloc.initWithContentRect_styleMask_backing_defer(rect, NSTitledWindowMask, 2, 0);
        @web_view = WebView.alloc.initWithFrame(rect);
        @web_view.setFrameLoadDelegate(self);
	@web_view.setPolicyDelegate(self);
        @win.setContentView(@web_view);
	@win.setLevel(OSX::CGWindowLevelForKey(9));
	#@win.setOpaque(false);
	#@win.setBackgroundColor(NSColor.clearColor);
	#@web_view.setDrawsBackground(false);

	 @win.setTitle(ARGV[1]);
	 @win.setCanHide( false );
        @win.setHidesOnDeactivate(false);

      end


      def applicationDidFinishLaunching(notification)
        @web_view.mainFrame.loadHTMLString_baseURL(ARGV[0],nil);
	end

	def webView_decidePolicyForNavigationAction_request_frame_decisionListener(sender, actionInformation, request, frame, listener)
		actionKey = actionInformation.objectForKey(OSX::WebActionNavigationTypeKey).intValue();

		#NSLog('webView_decidePolicyForNavigationAction_request_frame_decisionListener');
		url = actionInformation.objectForKey(OSX::WebActionOriginalURLKey);

		#NSLog('actionKey %d  url = %@', actionKey ,url);

		if /^click:/ =~ url.absoluteString()
			print url.absoluteString();
			NSApplication.sharedApplication().terminate(nil);
		else
			listener.use()
		end
	end

      def webView_didFinishLoadForFrame(web_view, frame)
	  	if NSApplication.sharedApplication().respondsToSelector('setActivationPolicy:')
			NSApplication.sharedApplication().setActivationPolicy(0);
		end

		  NSApplication.sharedApplication().activateIgnoringOtherApps(true);
		@win.makeKeyAndOrderFront(nil);
	end


  end
  end
WebViewFormDialog::Run.new"
	set theFormResult to do shell script "/usr/bin/ruby -e " & quoted form of theRubyScript & "  " & quoted form of theHTML & " " & quoted form of windowTitle & " " & windowWidth


	set prefixLen to length of "click:?"
	set theFormResult to text (1 + prefixLen) thru -1 of theFormResult

	set saveDelimiters to AppleScript's text item delimiters
	set AppleScript's text item delimiters to "&"
	set theFormResultList to text items of theFormResult
	set AppleScript's text item delimiters to saveDelimiters


	set theButton to ""
	set formList to {}

	repeat with i from 1 to inputCount
		set end of formList to ""
	end repeat


	repeat with theItem in theFormResultList
		set saveDelimiters to AppleScript's text item delimiters
		set AppleScript's text item delimiters to "="
		set inputList to text items of theItem
		set AppleScript's text item delimiters to saveDelimiters

		set theName to item 1 of inputList
		set theValue to item 2 of inputList
		set theValue to do shell script "php -r 'print urldecode($argv[2]);' '' " & quoted form of theValue

		if theName is "button" then
			set theButton to theValue
		else
			set theIndex to theName as number
			if length of formList < theIndex then
				repeat with i from (length of formList) + 1 to theIndex
					set formList to formList & {""}
				end repeat
			end if

			if item theIndex of formList is "" then
				set item theIndex of formList to theValue
			else
				if class of item theIndex of formList is not list then
					set item theIndex of formList to {item theIndex of formList}
				end if

				set end of item theIndex of formList to theValue
			end if
		end if
	end repeat

	return {button returned:theButton, |form returned|:formList}

end displayHTMLFormDialog

on urldecode(theText)
	return do shell script "php -r 'print urldecode($argv[2]);' '' " & quoted form of theText
end urldecode

on urlencode(theText)
	return do shell script "php -r 'print rawurlencode($argv[2]);' '' " & quoted form of theText
end urlencode

on htmlspecialchars(theText)
	return do shell script "php -r 'print htmlspecialchars($argv[2]);' '' " & quoted form of theText
end htmlspecialchars
キーチェーンにはスクリーンをロックする機能があります。これをAppleScriptから実行するにはGUIを操作してメニューを選ぶ方法がありますが、バンドルをロードして直接命令を実行してみたらどうかと思い試してみたら実行できました。この方法だとメニューに表示していなくても実行できます。使えない場合も多いと思いますが(今回のように何かの機能を呼び出すだけならいけるかな)他のソフトでも実行したい命令がある時に応用が利くかもしれません。
読み込むバンドルのクラス、メソッドはclass-dumpで調べることができます。
スクリーンをロックについてはMacのディスプレイやキーチェーンを簡単にロックしてセキュリティを確保する方法 / Inforatiが参考になります。
my lockScreen()

on lockScreen()
	set theRubyScript to "require 'osx/cocoa';
	bundle = OSX::NSBundle.bundleWithPath('/Applications/Utilities/Keychain Access.app/Contents/Resources/Keychain.menu/');
	bundle.load();
	theClass = bundle.classNamed('AppleKeychainExtra');
	keyChain = theClass.alloc().initWithBundle(nil);
	keyChain._lockScreenMenuHit(nil);
	"
	return do shell script "/usr/bin/ruby -e " & quoted form of theRubyScript
end lockScreen
screenVisibleSizeはスクリーンを番号で指定して、screenVisibleSizeAtPointは指定した座標にあるスクリーンが対象になります。
ウインドウのリサイズ時のウインドウ表示可能なエリアのサイズとして使えるかな。
log my screenVisibleSize(1)
log my screenVisibleSize(2)

on screenVisibleSize(screenIndex)
	set theScript to "require 'osx/cocoa';
i = (ARGV[1].to_i) - 1;
frameM = OSX::NSScreen.mainScreen().frame();
frameT = OSX::NSScreen.screens[i].visibleFrame();
print (frameT.origin.x);
print '
';
print (-frameT.origin.y - frameT.size.height + frameM.size.height - frameM.origin.y);
print '
';
print frameT.size.width;
print '
';
print frameT.size.height;
"
	set sizeText to do shell script "/usr/bin/ruby -e " & quoted form of theScript & " '' " & " " & screenIndex
	return {x:(paragraph 1 of sizeText) as number, y:(paragraph 2 of sizeText) as number, width:(paragraph 3 of sizeText) as number, height:(paragraph 4 of sizeText) as number}
end screenVisibleSize
set mpt to my getMouseLocation()
log my screenVisibleSizeAtPoint(item 1 of mpt, item 2 of mpt)
log my screenVisibleSizeAtPoint(25555, 7771)-- missing value
on screenVisibleSizeAtPoint(x, y)
set theScript to "require 'osx/cocoa';
x = (ARGV[1].to_i);
y = (ARGV[2].to_i);
frameT = 0;
frameM = OSX::NSScreen.mainScreen().frame();
screens = OSX::NSScreen.screens;
cocoaPoint = OSX::NSMakePoint(x, frameM.size.height + frameM.origin.y - y);
for i in 0..screens.count()-1
f = screens[i].frame();
if( OSX:: NSMouseInRect(cocoaPoint,f,0) )
frameT = screens[i].visibleFrame();
break;
end
end
if frameT == 0
exit 0;
end
print (frameT.origin.x);
print '
';
print (-frameT.origin.y - frameT.size.height + frameM.size.height - frameM.origin.y);
print '
';
print frameT.size.width;
print '
';
print frameT.size.height;
"
set sizeText to do shell script "/usr/bin/ruby -e " & quoted form of theScript & " '' " & " " & x & " " & y
if sizeText is "" then
return missing value
end if
return {x:(paragraph 1 of sizeText) as number, y:(paragraph 2 of sizeText) as number, width:(paragraph 3 of sizeText) as number, height:(paragraph 4 of sizeText) as number}
end screenVisibleSizeAtPoint
on getMouseLocation()
set theRubyScript to "require 'osx/cocoa';
event=OSX::CGEventCreate(nil);
pt = OSX::CGEventGetLocation(event);
print pt.x, '
',pt.y;
"
set thePtText to do shell script "/usr/bin/ruby -e " & quoted form of theRubyScript
set theResultList to {paragraph 1 of thePtText as number, paragraph 2 of thePtText as number}
return theResultList
end getMouseLocationおまけのスクリーンサイズを取得するだけのAppleScriptです。以前はFinderから取得していたのですが、Finderに問題がある時に取得できないことがあったので作りました。二つ目のディスプレイ等も取得できます。
log my screenSize(1)

on screenSize(screenIndex)
	set theScript to "require 'osx/cocoa';
i = (ARGV[1].to_i) - 1;
frame = OSX::NSScreen.screens[i].frame();
print frame.size.width,' ',frame.size.height;
"
	set sizeText to do shell script "/usr/bin/ruby -e " & quoted form of theScript & " '' " & " " & screenIndex
	return {(word 1 of sizeText) as number, (word 2 of sizeText) as number}
end screenSizeリンクのテキストをクリップボードに入れるAppleScriptです。
サンプルではメールのメッセージへのリンクをクリップボードに入れてみました。
こんな感じでクリックでメールが開くメールのリンクをまとめた文書を作ることができます。

(*
Mailで選択しているメールメッセージへのリンクをクリップボードに入れる
*)
try
	tell application "Mail"
		set theSelection to selection
		set theMessage to item 1 of theSelection
		set theSubject to subject of theMessage
		set theURL to "message://%3c" & message id of theMessage & "%3e"
	end tell

	my copyLinkTextToClipboard(theSubject, theURL)
on error msg
	log msg
	beep
end try
on copyLinkTextToClipboard(theText, theURL)
	set theScript to "require 'osx/cocoa';
t = ARGV[1].to_ns;
u = ARGV[2].to_ns;
attrString = OSX::NSMutableAttributedString.alloc().initWithString_(t);
range = [0, attrString.length() ];
attrString.beginEditing();
attrString.addAttribute_value_range_(OSX::NSLinkAttributeName, u, range );
attrString.addAttribute_value_range_(OSX::NSForegroundColorAttributeName, OSX::NSColor.blueColor(),range);;
 attrString.addAttribute_value_range_(OSX::NSNumber.numberWithInt_(OSX::NSSingleUnderlineStyle), OSX::NSColor.blueColor(),range);
attrString.appendAttributedString_(OSX::NSAttributedString.alloc().initWithString_(' '));
attrString.endEditing();


pb = OSX::NSPasteboard.generalPasteboard;
pb.clearContents();
pb.writeObjects_([attrString]);
"

	do shell script "/usr/bin/ruby -e " & quoted form of theScript & " 1 " & quoted form of theText & " " & quoted form of theURL
end copyLinkTextToClipboard
Pythonは全然知らないので動いたらOKとしています。
10.6以降で動くと思われます。
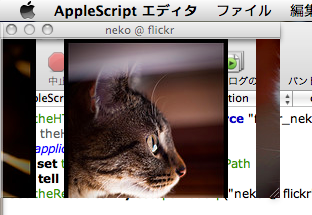
from objc import * or from objc import YES, NO, NULL, nilで。「flickrのねこ画像をスクロール表示する」htmlをGrowlで表示してみたのですがGrowlだと場所が固定でずっと表示しておくには邪魔になることがあります。そこでEscapeFrontWindowの様にマウスから逃げるウインドウで表示すればいいのではと思い、最初はRubyCocoaで作ったのですが、しばらくするとスクリプトが落ちるのでPyObjCで書き換えたのがこれです。落ちなくなりました。
たぶん10.6以降のみで正常に動作します。
'{CGPoint=dd}L'が気になってるところです。32bitだとffになるのかな?
MacBook 13インチ、15インチなどの小さなディスプレイの人に特に向いています。
Nico2CommentThrow (Hemus -Macアプリ)を使えるようにするスクリプトです。
Twitterを取得するAppleScriptが無いか探したらAppleScriptでTwitterの検索結果を取得しKeynoteに表示するKeynotterというものを作ろうとして失敗した (Kanasansoft Web Lab.)があったのでこれをベースに作りました。
名前はすごい適当です。
10.6で動作確認しています。10.5でも動くと思いますがわかりません。
コメントにURLがあったら開きたいのでドックのアイコンをクリックしたらコンテキストメニューを表示してURLを選んだらブラウザで開くようにした。
showContextMenuのPyObjC版です。RubyCocoa版との違いはドックにPythonのアイコンが表示されるということです。メニューが表示されるまでの時間もちょっと遅い気がします。
機能は全く同じなのでRubyCocoa版を使っていた人はハンドラを置き換えるだけでその他修正は必要ありません。ただ、あまりテストしていないので何かバグがあるかもしれません。
10.7でもテストしてサンプルと天気のスクリプトの動作は確認しました。
-- 簡単なメニュー
--set theResult to my showContextMenu({"いぬ", "ねこ", "きりん"})

--複雑なメニュー
set defaultStyle to "<style>*{font-size:18px; font-family:Hiragino Maru Gothic Pro}</style>"
set theResult to my showContextMenu({"---imageMaxWidth 128", "---imageMaxHeight 128", "", "---tag 100", "---html " & defaultStyle & "<font color=red>コンテキスト</font><font color=blue>メニュー</font><font color=green>を</font>", "---disable", "---separatorItem", "表示", "---state on", "できます", "---state mixed", "Lionでは画像のパスが変わっているので", "表示されない画像があります", "サブメニューも", "---submenu", "ひょうじ", "かのうです", "---submenu", "サブメニューのサブメニューもOK", "---end submenu", "画像も表示できます", "---image /Library/Desktop Pictures/Plants/Maple.jpg", "ネットの画像も表示できます", "", "---image http://www.google.co.jp/intl/ja_jp/images/logo.gif", "---tag 101", "Preview Icon", "---icon /Applications/Preview.app", "Safari Icon", "---icon Safari", "App Folder", "---icon /Applications", "サイトフォルダ", "---icon ~/Sites", "---end submenu", "終わり"})
log theResult


on showContextMenu(inMenuItemList)
	(*
ver.2011.08.13

注意:Pythonのアイコンが実行時にドックに表示されます。
注意:画像を表示する時に画像が無いと止まります。

スクリプト実行時のマウスの位置にコンテキストメニューを表示します。
返り値は選択したメニューの項目名です。選択しなかった場合は空文字です。

inMenuItemListがメニュー項目になり、
下記特殊文字列でいろいろなメニューを作ることができます。

★コンテキストメニューの表示場所
---contextMenuPosition center/mouse
デフォルトがmouseでマウスの場所に表示する。
centerで画面中央付近に表示する。

★サブメニューを作るには項目名を
---submenu
にします。

★サブメニューを終了するときは
---end submenu
にします。

★区切りは
---separatorItem
です。


▲項目名の次に次の文字列を書くことによりメニューの属性を設定できます。
★ ---disable
選択できないメニューアイテムにします。タイトル、説明等に。

★ ---state on/mixed
チェックを付けます

★ ---image URL/PATH
★ ---icon PATH
画像を表示します。iconの場合アプリケーション、ファイルのアイコンです。
これの前に
 ★ ---imageMaxWidth #maxPixel
 ★ ---imageMaxHeight #maxPixel
を書くことによって画像の最大サイズを設定できます。
設定すると以降すべて適用されます。複数回設定することも可能です。
デフォルトは0で原寸で表示します。
PATHは
~/Sites/hoge.html
形式でも書けます。

★ ---tag #tagNo
選択時に項目名ではなく#tagNoを返すようになります。
項目名が空文字や同じ項目名がある場合に区別したい場合に使います。
#tagNoは1以上の数値。

★ ---html html text
文字列を指定したHTMLにします。ただし、すべての装飾に対応していません。
これの前に
 ★ ---baseURL url
を書くことによってbaseURLの設定ができます。


*)
	set theArgvStr to ""
	repeat with theItem in inMenuItemList
		set theArgvStr to theArgvStr & " " & quoted form of theItem
	end repeat


	set theScript to "

#!/usr/bin/env pythonw
#coding: UTF-8

import sys
import objc
import re
from Foundation import *
from AppKit import *
from PyObjCTools import AppHelper
from objc import YES, NO, NULL, nil

bndl = objc.loadBundle('CoreGraphics', globals(), '/System/Library/Frameworks/ApplicationServices.framework');

# http://journal.mycom.co.jp/column/objc/020/index.html
FUNCTIONS=[
    ( u'CGEventCreate', 'LL' ),
    # 64bitだと?ffじゃなくてddみたいだった
    ( u'CGEventGetLocation', '{CGPoint=dd}L' ),
]

objc.loadBundleFunctions(bndl, globals(),FUNCTIONS);


class AppDelegate (NSObject):

    def applicationDidFinishLaunching_(self, aNotification):
        argvs = sys.argv;
        argc = len(argvs)

        win = NSWindow.alloc()
        frame = ((-1.0, -1.0), (1, 1))
        win = win.initWithContentRect_styleMask_backing_defer_(frame, NSBorderlessWindowMask, 2, 0)

        self.win = win;

        theMenu = NSMenu.alloc().initWithTitle_('AS context menu');

        theMenu.setAutoenablesItems_(False);
        theMenu.setDelegate_(self)


        menuArray = [ theMenu ];
        lastMenuItem = nil;

        imageMaxWidth = 0;
        imageMaxHeight = 0;

        fontSize = 0;
        baseURL = nil;

        contextMenuPosition = 'mouse';

        argvs.pop(0);
        argvs.pop(0);
        for theStr in argvs:
            m = re.search(r'^---imageMaxWidth (.+)', theStr );
            if m:
                imageMaxWidth = int( m.group(1) );
                continue;

            m = re.search(r'^---imageMaxHeight (.+)', theStr);
            if m:
                imageMaxHeight = int( m.group(1) );
                continue;

            m = re.search(r'^---fontSize (.+)', theStr);
            if m:
                fontSize = int( m.group(1) );
                continue;

            m = re.search(r'^---baseURL (.+)', theStr)
            if m:
                baseURL = m.group(1);
                continue;

            m = re.search(r'^---contextMenuPosition (.+)', theStr)
            if m:
                contextMenuPosition = m.group(1);
                continue;

            m = re.search(r'^---submenu', theStr)
            if m:
                theSubMenu = NSMenu.alloc().initWithTitle_('');
                theSubMenu.setAutoenablesItems_(False);
                lastMenuItem.setSubmenu_(theSubMenu);

                menuArray.insert(0,theSubMenu);
                continue;

            m = re.search(r'^---end submenu', theStr)
            if m:
                menuArray.pop(0);
                continue;

            m = re.search(r'^---disable', theStr)
            if m:
                lastMenuItem.setEnabled_(False);
                continue;

            m = re.search(r'---state (on|mixed|off)', theStr)
            if m:
                v = m.group(1);
                if( v == 'on' ):
                    lastMenuItem.setState_(NSOnState);
                elif( v == 'mixed' ):
                    lastMenuItem.setState_(NSMixedState);
                continue;

            m = re.search(r'---(image|icon) (.+)', theStr)
            if m:
                imageType = m.group(1);
                path = NSString.stringWithString_(m.group(2));

                if re.search(r'^~', path):
                    path = path.stringByExpandingTildeInPath();

                if imageType == 'icon':
                    path = NSWorkspace.sharedWorkspace().fullPathForApplication_(path);
                    image = NSWorkspace.sharedWorkspace().iconForFile_(path);
                else:
                    if re.search(r'^http', path):
                        image = NSImage.alloc().initWithContentsOfURL_(NSURL.URLWithString_(path));
                    else:
                        image = NSImage.alloc().initWithContentsOfFile_(path);
                if image == None:
                    continue
                imgSize = image.size();

                if( imageMaxWidth >0 and imgSize.width > imageMaxWidth ):
                    imgSize.height = imgSize.height * imageMaxWidth / imgSize.width;
                    imgSize.width = imageMaxWidth

                if( imageMaxHeight >0 and imgSize.height > imageMaxHeight ):
                    imgSize.width = imgSize.width * imageMaxHeight / imgSize.height;
                    imgSize.height = imageMaxHeight

                image.setSize_(imgSize);

                lastMenuItem.setImage_(image);

                continue;

            m = re.search(r'^---tag (.+)', theStr)
            if m:
                lastMenuItem.setTag_( int( m.group(1) ));
                continue;

            m = re.search(r'^---separatorItem', theStr)
            if m:
                menuArray[0].addItem_( NSMenuItem.separatorItem());
                continue;

            m = re.search('^---html (.+)', theStr, re.M ) #re.compile( r'^---html (.+)', re.S | re.M ).search( theStr )
            if m:
                html = NSString.stringWithString_( m.group(1).decode('utf-8') );
                theData = html.dataUsingEncoding_( NSUTF8StringEncoding);
                if baseURL != nil:
                    opt =NSMutableDictionary.dictionaryWithCapacity_(2);
                    opt.setObject_forKey_( NSUTF8StringEncoding, NSCharacterEncodingDocumentOption)
                    opt.setObject_forKey_( baseURL, NSBaseURLDocumentOption)
                else:
                    opt =NSMutableDictionary.dictionaryWithCapacity_(2);
                    opt.setObject_forKey_( NSUTF8StringEncoding, NSCharacterEncodingDocumentOption)
                attrStr = NSAttributedString.alloc().initWithHTML_options_documentAttributes_(theData,opt,nil)[0];
                lastMenuItem.setAttributedTitle_(attrStr);
                continue;

            menuItem  = menuArray[0].addItemWithTitle_action_keyEquivalent_(theStr.decode('utf-8'),  'selectMenu:','');
            menuItem.setTarget_(self);
            menuItem.setTag_(0);
            lastMenuItem = menuItem;


        screenSize = NSScreen.mainScreen().frame();

        cgevent= CGEventCreate(0);


        pt =  CGEventGetLocation(cgevent);
        if contextMenuPosition == 'center':
            pt.x = screenSize.size.width / 3.3;
            pt.y = screenSize.size.height - 30;
        else:
            pt.y = screenSize.size.height - pt.y;

        event = NSEvent.mouseEventWithType_location_modifierFlags_timestamp_windowNumber_context_eventNumber_clickCount_pressure_(NSLeftMouseDown,pt,0,0,win.windowNumber(),nil,0,0,1.0);
        font = nil;
        if fontSize != 0:
            font = NSFont.menuBarFontOfSize_(fontSize)

        NSMenu.popUpContextMenu_withEvent_forView_withFont_(theMenu, event, nil,font );


    def menuDidClose_(self, menu):
        NSApplication.sharedApplication().performSelector_withObject_afterDelay_('terminate:',nil,0.2);

    def selectMenu_(self,menuItem):
        tag = menuItem.tag();

        if tag != 0:
            print tag;
        else:
            print menuItem.title().UTF8String();
        NSApplication.sharedApplication().terminate_(nil);

def main():
    app = NSApplication.sharedApplication()

    # we must keep a reference to the delegate object ourselves,
    # NSApp.setDelegate_() doesn't retain it. A local variable is
    # enough here.

    delegate = AppDelegate.alloc().init()
    app.setDelegate_(delegate)

    #app.run();
    AppHelper.runEventLoop()


if __name__ == '__main__' : main()


	"

	set OriginalDelimiters to AppleScript's text item delimiters
	set AppleScript's text item delimiters to return
	set workData to text items of theScript
	set AppleScript's text item delimiters to ASCII character 10
	set theScript to workData as Unicode text
	set AppleScript's text item delimiters to OriginalDelimiters

	--set the clipboard to theArgvStr -- ターミナルで試すとき用

	return do shell script "/usr/bin/python -c " & quoted form of theScript & "  '' " & theArgvStr
end showContextMenu
最近URLをDragThingで管理し始めたのですがURLのアイコンがfaviconの方が分かりやすいと思って作ったスクリプトのアイコン設定部分です。ちょっと変更したら任意の画像を設定するのにも使えると思います。
スクリプトは長くなったのでここには書きません。スクリプトをダウンロードして見てください。
_SaveLoadWindowStatus.applescript.zip(.scptに保存し直して使ってください)複数の状態を保存したい場合はスクリプトをコピーしてスクリプトごとに状態を保存してください。
前からできないかとちょっと思っていたけど思ったより簡単にできてよかったです。こういう機能のアプリもあったような気もしますが。
WindowStatusManagerというGUIを付けたアプリケーションを作りました。
SaveLoadWindowStatusの改良版です。ファイルを開いていないアプリケーションも開くことができるようになりました。あと、バグ修正もあります。
使い方は_SaveLoadWindowStatusPlusOpenApp.appを開くと現在の状態が保存され、再度開くとその状態を復元します。一度状態保存した後に再度状態を保存したい場合はコマンドキー等の修飾キーを押しながら実行します。
_SaveLoadWindowStatusPlusOpenApp.appをスクリプトエディタで開くと開いているファイルを保存するアプリケーションを変更できます。デフォルトでは{"Finder", "mi", "Preview", "Safari"}となっています
複数の状態を保存したい場合はアプリケーションを複製して下さい。設定はアプリケーションに保存されています。。
.appがすぐに試せるアプリケーションで.applescriptがソースです。ソースを改良して使う場合はYahoo!デベロッパーネットワークでアプリケーションIDを取得する必要があります。.appは自分が取得したのを使ってますが公開禁止と言うことで実行専用になっています。
SayKanaが必要ですので入れてください。
読み上げ時に気になるところはちょっとだけ調整したつもりです。2chResViewで使ったのとほぼ同じです。
Yahoo APIを使うのでインターネットに繋がっている必要があります。
.appをダウンロード、解凍後に実行したら、インターネットからダウンロードしたけど開いていいですか?の確認ダイアログが出てOK押したら起動しなかったが、もう一回開いたら起動しました。一応メモとして書いておきます。
動画です。音が小さくなってしまいました。聞けばわかりますが日本語はsaykana、英語単語はsayでしゃべらせているので英語が交じっている文章は(かなり)不自然になります。二つ目の相撲の方は力士の名前等がちゃんと読めていてさすがYahoo APIと思いました。
SayKotoeriってのがありました。こっちの方がシンプルでいいかもしれません。いくつか読ませてみるとYahoo APIで読めてことえりで読めない物もありましたが(新語、人名)、そんなに気にならないかな。(追記:最近2chResViewProのテストでYahoo APIでしゃべらせていたけどYahoo APIもちゃんと読めないのがいっぱいありました。)
二つ目

上の方が新しいです
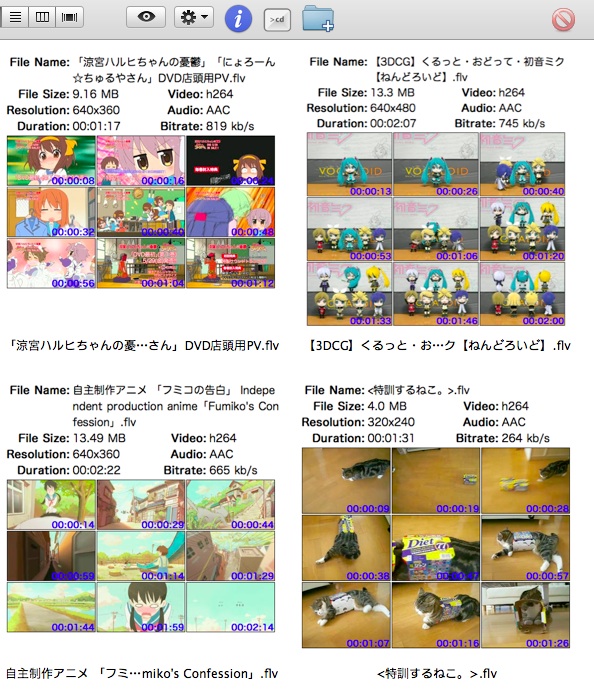
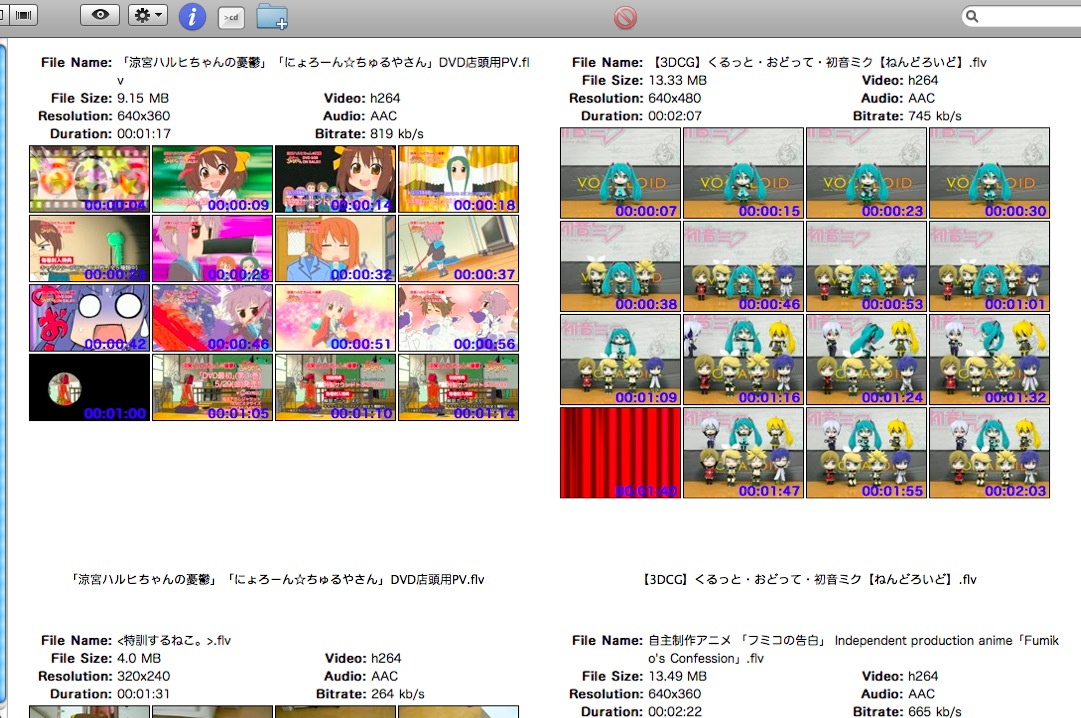
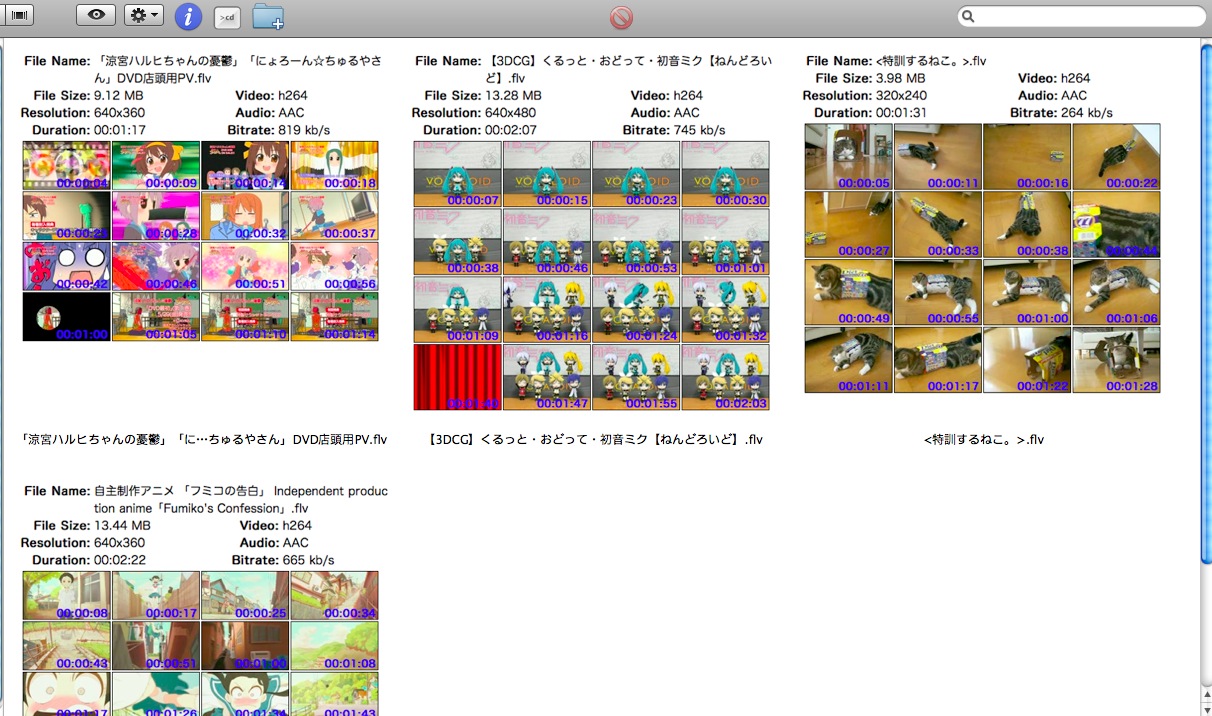
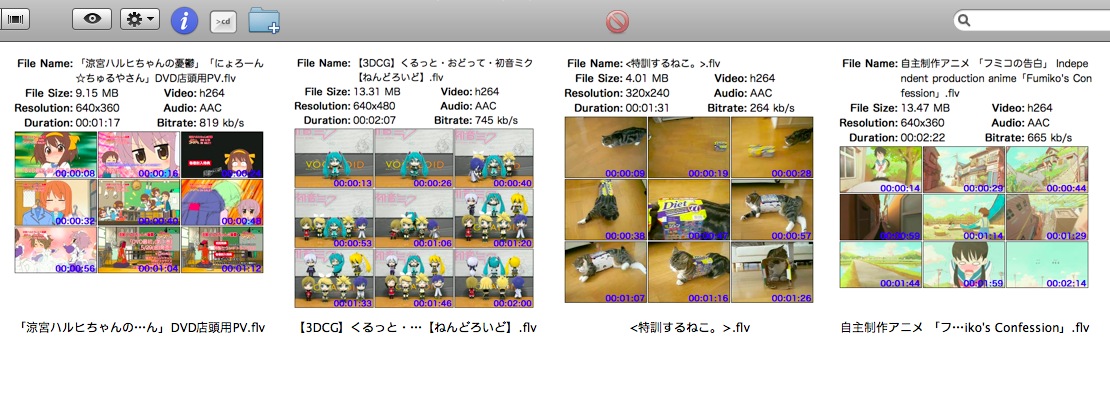
ffmpegとURLToImageとsetFinderIconを使った動画のサムネイルをアイコンに貼るAppleScript。使い方等はAppleScript エディタでアプリケーションを開いてスクリプトを見てください。
こんな感じになります。アイコンを貼るとアイコン内での動画の再生ができなくなります。
Finderのバグか仕様かわからないのですが、ときどきアイコンがぼやけて表示されてしまう場合があります。その場合Finderを再起動したら直ります。
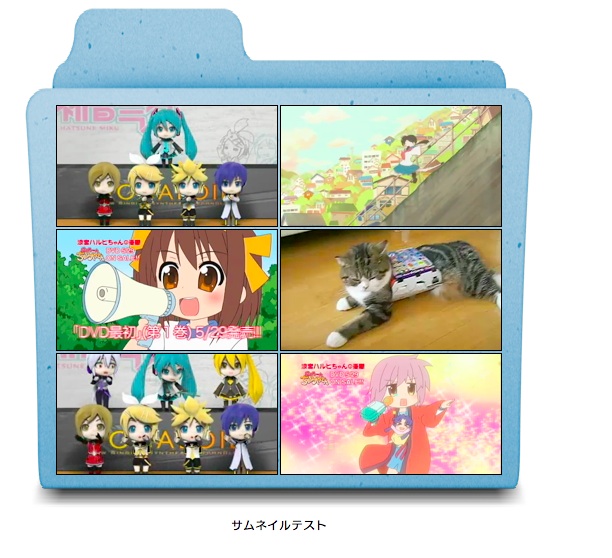
512pxのサンプル:372pxのサンプル:256pxのサンプル
UIElementActionのページに移動しました。
GUIスクリプティングをやってて、System Eventsでボタンの指定方法がよくわからない人、調べるのがめんどくさい人に向いてるかな。
最近Magic Launchというソフトを知りました。ファイルのパスで起動するアプリケーションを変えられるのは便利そうだなあと思い、似たようなことができないかなと思いました。そこで、一回代理アプリケーションでFinderに開かせて、そのアプリケーションで各種アプリケーションに振り分けたら同じようなことができるかなとやってみたらできました。AppleScriptのアプリケーションを経由して該当ファイルが開くので動作速度が気になりましたが、使ってみると気になりませんでした。
コマンドキーやかなキーや英数キーを押しながら開いたら指定したアプリケーションで開くようにもできます。コマンドキーより英数キー、かなキーの方がアプリケーションの動作に影響が無いので使いやすいです。Ver2でメニューで選択できるようにもなりました。
あとMultiBrowserってソフトがあるのも知ったのでVer2でこの機能も付けてみました。
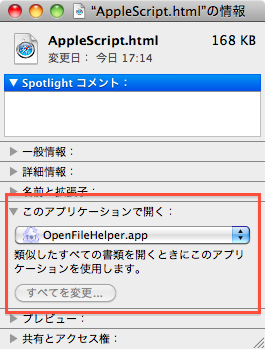
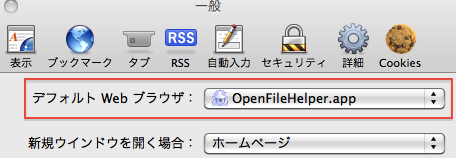
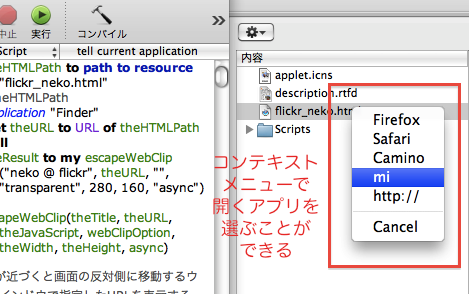
思った以上に便利な感じです。スクリプトエディタの「バンドルの内容」からhtmlを開く時にmiで開きたかったので、かなキーを押しながら開いたらmiで開くように設定したら、期待通りの動作になりました。押さなかったらFirefox、英数キーだとSafariといろいろ切り替えられるようになりました。Finderだとコンテキストメニューから開くアプリケーションを選べますが、コンテキストメニューから選べないFinder以外のアプリケーションでも動いたのでいろいろ便利に使えそうです。(といってもFinder以外から開くことは滅多にありませんが)
今までFTPSyncというソフトでFTPのミラーリングをしていてこれで何も不満は無かったのですが、借りているレンタルサーバがFTPの対応をやめてFTPSになってしまいました。FTPSyncはFTPSには対応していないので代わりのソフトを探して見つけたのがlftpです。それを実行するスクリプトです。実行するとミラーリングアップロードします。このサイトの場合、更新はミラーリングされればいいので、これを実行するだけで済み非常に楽です。
下記スクリプトはmemogaki.soudesune.netで実際に使っているものになります。
macportsで入れた3.7.6_1だとzipファイルのアップロードに失敗するので(ファイルが完全にアップロードされない)公式サイトから4.0.9をダウンロードしてビルドしてみました。4.0.9ではちゃんとアップロードできるようです。
lftpは./configureとmakeでビルドできたが、gnutlsってのが必要だったのでこれはmacportsで入れました。
そうこうしているうちにftpでまたアップロードできるようになるとか…
(*
lftpでミラリーングアップロードするスクリプト。
パスワードはキーチェーンから取得します。
自分はRBrowserでキーチェーンに記憶させています。
Growlは改造版を使用します。
通知をクリックするとログファイルを開きます。
ログにはパスワードも書いてあったので気になるなら削除した方がいいかも。
*)

set theServer to "memogaki.soudesune.net" -- サーバ
set theAccount to "memogaki.soudesune.net" -- アカウント名
set theLocalFolder to "~/Sites/memogaki/" -- ローカルフォルダ
set theServerFolder to "/" -- サーバのフォルダ
set excludeFile to "-X .DS_Store -X _* -X *のコピー* -X *(オリジナル)*" -- 除外ファイル -- 参考: http://osima.jp/blog/lftp-svn.html

set openLogApp to "mi" -- ログを表示するアプリ
set logPath to "~/.lftp/transfer_log" -- ログのパス

set thePassword to do shell script "security find-internet-password -g -s " & quoted form of theServer & " -a " & quoted form of theAccount & " 2>&1" & " | perl -ne 'print $1 if m/password: \"(.*)\"/; '"

set theScript to "
open -u  " & theAccount & "," & thePassword & " " & theServer & "
mirror -R " & excludeFile & " --verbose --delete --only-newer " & theLocalFolder & " " & theServerFolder & "
close
quit
"
set OriginalDelimiters to AppleScript's text item delimiters
set AppleScript's text item delimiters to return
set workData to text items of theScript
set AppleScript's text item delimiters to ASCII character 10
set theScript to workData as string
set AppleScript's text item delimiters to OriginalDelimiters

my showMessageByGrowl("upload", "lftp Upload Start", theServer, false)
set theResult to do shell script "/usr/local/bin/lftp -e " & quoted form of theScript


set theAppleScript to "do shell script \"open -a " & openLogApp & "  " & logPath & " \""
set theMessage to theServer & return & "Click and Open Log" & return & "-----" & theResult & "<<<AppleScript>>>" & theAppleScript
my showMessageByGrowl("upload", "lftp Upload Complete", theMessage, true)


on showMessageByGrowl(notifType, inTitle, inMessage, isStiky)
	set appName to "lftp"
	set allNotifs to {"upload"}

	tell application "GrowlHelperApp"
		register as application appName all notifications allNotifs default notifications allNotifs
		if isStiky then
			notify with name notifType title inTitle application name appName description inMessage with sticky
		else
			notify with name notifType title inTitle application name appName description inMessage
		end if
	end tell
end showMessageByGrowl
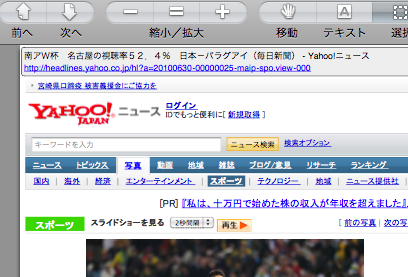
URLToImageとJoinPDFWithOutlineを使ったAppleScriptです。
Safariで表示したURLをURLToImageでPDFで保存していき、Safari WebPages to One PDF.appの終了時にJoinPDFWithOutlineで結合します。
保存したページの上部にはページの情報を追加しますが、サイトによってはちゃんと表示されなかったり、サイトのレイアウトが崩れたりすることがあるかもしれません。
調べものをする時にこれを使うと調べたページをすべて含む一つのPDFができてあとから参照する時に便利かな?、と思ったけどまだ使ったことはありません。
Safariで表示しているものをそのまま保存するSafariWebView2Pdfとそれ用のSafari WebPages to One PDFを作りました。
今までブラウザの方でブロックしてましたが、hostsでブロックするとすべてのブラウザで効果があるのでこの方法を試してみたところ、特に問題なくブロックできました。簡単に気になるホストを登録できれば便利なので登録用のAppleScriptを作ってみました。これならさくっと気になるJavaScriptのホストを登録できそうです。
スクリプトのコメントも見てください。
念のためhostsファイルのバックアップを作ってから実行してください。
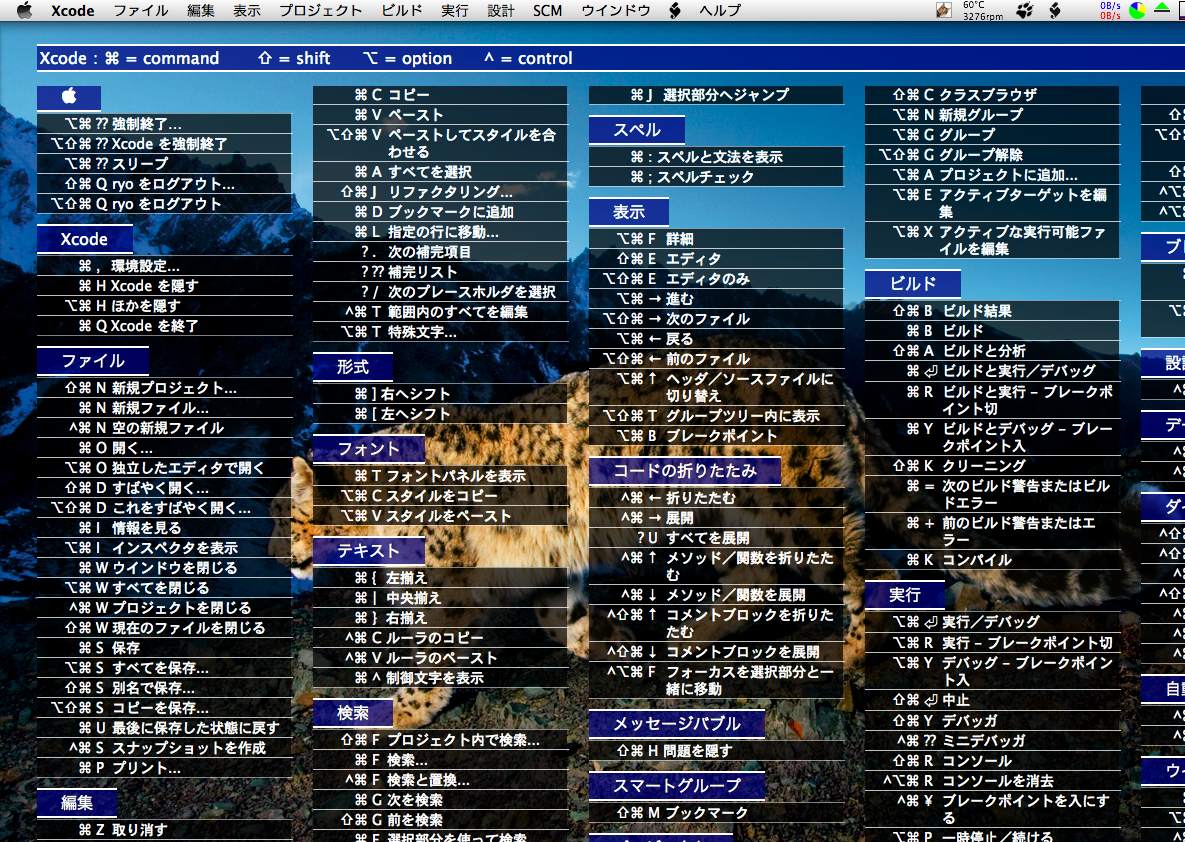
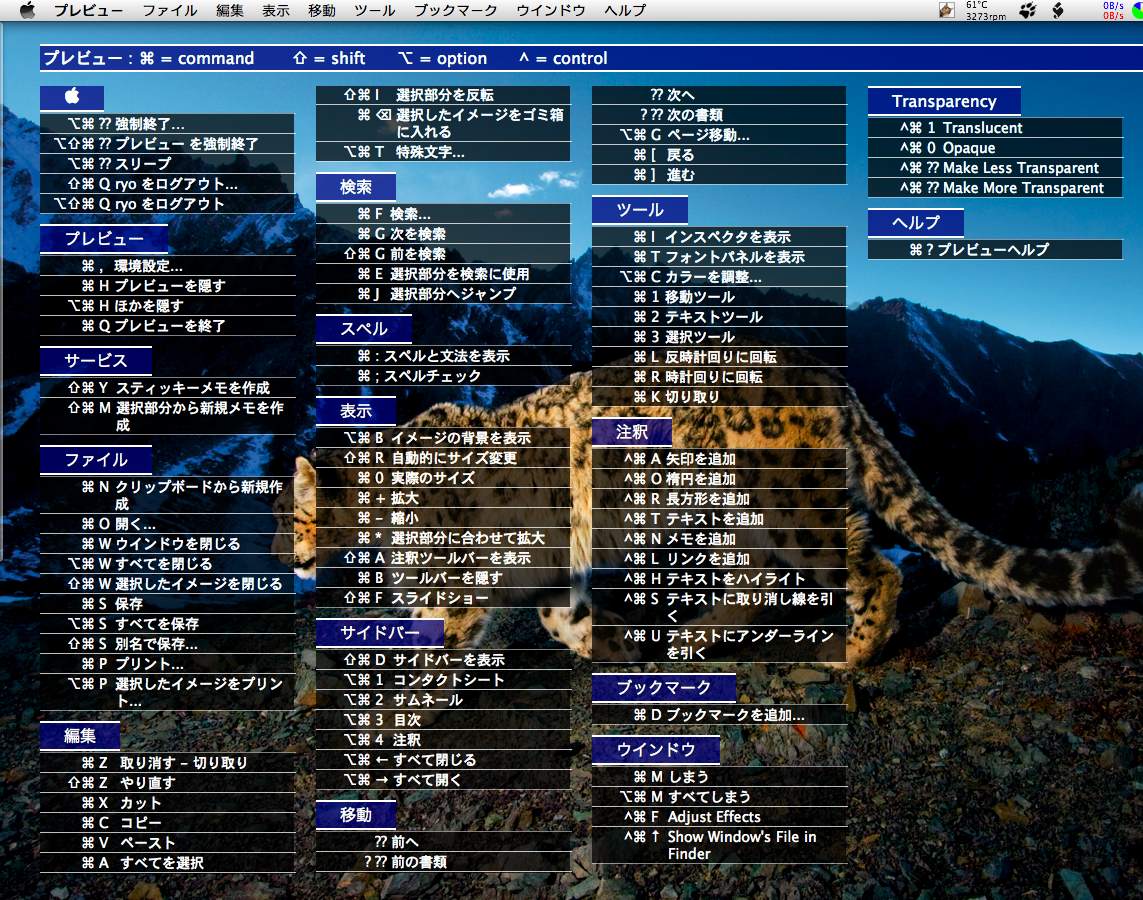
デスクトップにこういう物を表示できます。
KeyCueというソフトを知って、キーボードショートカットをデスクトップに表示したらどうかな?と思い作ってみました。
一応動くところまでできましたが動作速度などの点から実用ではないかもしれません。最初に問題点を書いておきます
ただ、一度取得したメニューはファイルに保存するので二度目に表示する時は重くなりません。最初だけ我慢すれば大丈夫かもしれません。ただし、tmpフォルダに保存しているので再起動で消えます。また、動的にメニューが変わる場合は対応できません。
だいたい動いて満足したので未完成な部分があります。
ShortcutToDesktopを起動するとデスクトップに表示されます。起動直後はデスクトップのアイコンより前に表示されるようですが、アイコンを表示するとアイコンが手前に表示されるようになります。
スクリプトのpressCmdAndFloatが1の場合、コマンドキーを1秒ぐらい押しているとデスクトップに表示しているウインドウを最前面に移動します。ShortcutAction.appがある場合、表示したメニュー項目をクリックするとShortcutAction.appがショートカットキーを押し、コマンドを実行できます。KeyCueの説明書に押したら実行できるとあったのでマネできるか挑戦してみて無理矢理だけど一応できました。この仕組みは特定のURLを開くことによりShortcutAction.appに命令を渡しているのですが、ブラウザからキーボードショートカットが実行できるということなので、注意してください。本当はrubyでキーイベントを送ったらいいのですが、めんどくさそうだったのでとりあえずこうしました。
取得したショートカットは~/Library/Caches/TemporaryItems/フォルダにアプリケーション毎にHTMLファイルとして保存されています。
とりあえず作ってみて、作ってる時は楽しかったけど、実際に使うことは無いかなあ…、という感じです。そういうわけでショートカットキーが全部表示されない等細かいところはできてないです。気に入った人は完成させてみてください。
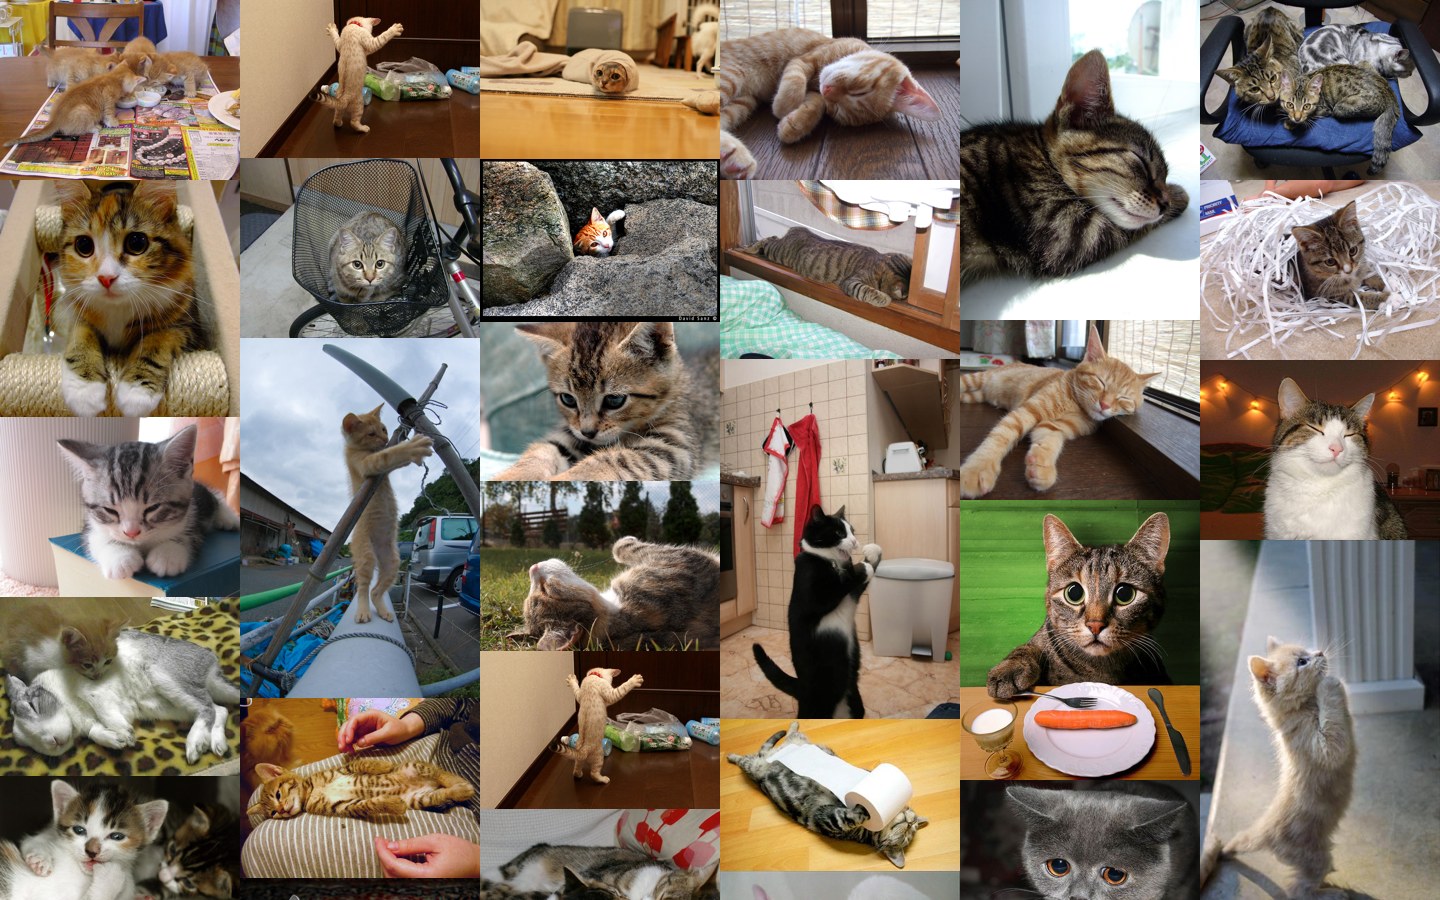
横幅固定で並べます。画像サイズが不揃いでも大丈夫です。
下記画像はPC内の猫画像を適当に・・・を使わせてもらいました。
画像ファイルをmakeMosaicDesktopPicture.appにドラッグドロップするとデスクトップに並べた画像が保存されます。
作成される画像サイズはスクリーンのサイズです。作成中、画像結合用のHTMLを表示するウインドウが一瞬表示されます。
画像はオリジナルサイズのままHTMLに表示するので大きい画像が大量にあるとメモリを沢山使い時間もかかります。
ドロップする画像数は必要最低限にすると、いろいろと無駄が無いです。
作成用のHTMLの縦幅は多めに取っているので画面の外で表示されていて、できた画像に表示されない画像もあります。
CSSやHTMLを知っているならスクリプト中のCSSやHTMLをいじって見え方を調整できると思います。
HTMLをPNGにするところですごいはまって時間がかかったので、細かいところの微調整をする気力が燃え尽きた…。URLToImageで簡単にできると思ったら、これで画像にすると、画面で表示されているのとは違うレイアウトで保存された。
元テキストと同じフォルダにファイル名の末尾にインデックスを付けて保存します。
拡張子がtxtのファイルのみ処理対象にします。
Finderでこのアプリケーションアイコンにテキストファイルをドロッグドロップするか ダブルクリックで実行時に表示されるダイアログでテキストファイルを選択して使用します。
注意: 一つの段落が指定した文字数以上の場合、それを適当に分割することはしません。 そのまま保存します。一応ダイアログでそのようなファイルがあったことだけ表示します。
自分は持ってませんが、ポメラ向けのテキストができるようです。持ってないのでポメラで問題なく見れるかはわかりません。
分割する文字数を変更するにはアプリケーションをAppleScriptエディタで開いて数字を書き換えます。デフォルトでは27000になっています。
追記:ポメラDM5で分割文字数を7500にして、試したら読み込めたとコメントいただきました。
フォルダ内にファイルやエイリアス等を入れて、そのフォルダの名前に.allopenを付けてパッケージにします。そしてそのパッケージを開くと、そのフォルダ内に入れたファイルやエイリアス等が全部開くというAppleScriptアプリケーションです。
詳しい説明はアプリケーションをAppleScriptエディタで開くと書いてあります。
(*
拡張子が.allopenのパッケージ内のファイルをすべて開きます。

使い方:
Finderでフォルダを作って、その中に開きたいファイルやアプリのエイリアスを入れます。
エイリアスじゃなくてファイルそのものやweblocなどなんでも大丈夫です。
フォルダ名に.allopenを付けます。
するとフォルダがパッケージになり、このパッケージをダブルクリックすると
AllOpen.appが中に入っているファイルを開きます。
.allopenはコンテキストメニューの「パッケージの内容を表示」で中を見て、ファイルの追加削除ができます。


開く間隔をスポットライトコメントに書くことができます。単位は秒です。
パッケージのスポットライトコメントに書いたのはデフォルト間隔で
すべてのファイルを開いた後にこの秒数間隔を空けます。
個別に間隔を指定したい場合はパッケージ内に入れたファイルのスポットライトコメントに書きます。
ファイルを開いた後にスポットライトコメントに書いてある秒数待ちます。

例:
3
とスポットライトコメントに書くと3秒待ちます

ファイルにラベルを付けると(どれでも)開いた後に
最前面のアプリケーションを隠します。
通常開いたアプリケーションが最前面になっていると思うので
開いたアプリケーションが隠れると思います。

開く順番はファイル名順のようなので
ファイル名を
001.hoge.app
002.hage.app
のようにすることによって順番を調整できます
*)
(*
コマンド + Mでドックにしまったウインドウを表示するAppleScriptです。
複数のウインドウがしまってある場合はダイアログで選択するようにしてみました。

コマンド + Mでしまって
コマンド + コントロール + Mなどでこれを実行するようにしておくといいかなと思いました。
ダイアログもキーボードで操作できます。
*)

set activeApp to (path to frontmost application as Unicode text)

tell application "System Events"
	set p to every process whose frontmost is true
	tell item 1 of p
		set winList to every window whose value of attribute "AXMinimized" is true
		if 0 is (count of winList) then
			say "no window"
			return
		else if 1 is (count of winList) then
			tell item 1 of winList
				perform action "AXRaise"
			end tell
		else

			set i to 1
			set nameList to {}
			repeat with theWin in winList
				try
					set theName to name of theWin
					set end of nameList to "No. " & i & " - " & theName
				end try
				set i to i + 1
			end repeat

			activate
			set theResult to choose from list nameList with title "Unminimized" with prompt "ウインドウを選択して下さい" with multiple selections allowed and empty selection allowed
			if theResult is false then
				return
			end if

			repeat with theWinName in theResult
				set i to word 2 of theWinName
				set i to i as number
				tell item i of winList
					perform action "AXRaise"
				end tell
			end repeat

		end if
	end tell
end tell

tell application activeApp
	activate
end tellFinderでこのアプリケーションアイコンにテキストファイルをドロッグドロップするか ダブルクリックで実行時に表示されるダイアログでテキストファイルを選択して使用します。
折り返す文字数はアプリケーションをAppleScriptエディタで開いて数字を書き換えます。
miによると出力されるテキストの文字コードはUTF-16で改行コードはCRです。
普通に書いたらあまりに遅かったのでリスト処理を高速化する技を入れてみたら劇的に早くなりました。効果のすごさに感動しました。